Author Archives: Colby Pearce

Misconceptions about bicycle fitting

There are several strongly held misconceptions about bike fitting. In the name of slaying sacred cows, let us proceed.  

Biomechanics are Everything 

This belief holds that everything is fixed by changing things on the bike. If an athlete’s lower back hurts, it can be “fixed” by changing saddle brand, saddle height, saddle fore-aft, insoles, cleat wedges or footbeds. Or maybe crank length. If a rider’s knee hurts, we consult the same list of variables. If this list does not solve the problem, we are not sure what to do. 

If the fitter is trained in physical therapy, they may prescribe off the bike exercises that will help correct or optimize a rider’s movement patterns on the bike. 

Sometimes this method will help a rider, but not always. Sometimes a rider will experience temporary relief only to have symptoms return. In some cases, a corrective exercise program will not be enough to restore health to a rider. 

It is far more common for injuries and chronic pain to be driven by movement patterns which are a function of the rider’s inherent ability to generate force than it is from the bike. How the athlete relates to the bike can magnify these patterns. Bicycles are devices that inherently “spin up” human asymmetries and spiral patterns, in a way that causes dysfunction and challenge. All endurance sports are generators of Pattern Overload, which simply means that muscle length-tension relationships and fascial regions become imbalanced, which eventually causes challenge [read: pain]. Of all the endurance sports that involve repetitive movement patterns [most do], cycling is arguably the best at causing Pattern Overload. 

For an excellent article that explains this concept further, read here

Chronic pain is the way the nervous system tells us that what we are doing isn’t working.

Every once in a while an injury is caused by a twisted saddle or a misaligned cleat, but this is  one or two out of a hundred cases. The rest are a split percentage of responsibility between the set up of the bike and the function of the athlete. The job of the fitter is to discern which is which, how much overlap there is, and what to do about it.

The function of the athlete means the total expression of movement as an end result of everything you are: your anthropometrics, phenotype, belief systems, injury history, life experience, lifestyle choices, and cycling dream, goal or objective. Only in consideration of these factors as part of total physiological load is it possible to discern the true root or mother of a problem or challenge. 

The important part to understand about this paradigm is the reversal of the order of operations. The common belief is that biomechanics drive the outcome [of pain, discomfort or alternatively flow state or effortless effort] while in fact, the intent of the athlete drives the biomechanics. This is natural law, all athletes [and humans] are ultimately simply expressions of their natural energy and drive [or what might be called the soul]. 

Another way to say this is: who you are dictates how you express everything you do. This statement might seen trite but it is actually quite deep. 

Of course if an athlete who is fully aligned with their intent would have trouble producing their optimal 40KM time trial performance on a tricycle, so the biomechanical relationship of rider and bike is non-trivial. That said, the true expression of optimal movement must account for the whole athlete. As examples, we can consider Panjabi’s model, Paul Chek’s Totem Pole, as well as the Bio-Pscyho-Social model in our examination. For a bit more on this topic, see my article on Integrative Bicycle Fitting. 

The synopsis of my point is that we have to look beyond the biomechanical model in many instances to truly resolve the challenges a client has with their fit. 

One and Done

Riders are commonly under the belief that once their fit is dialed, they are done forever and can simply replicate these choices moving forward for all future bicycles.  Equipment choices such as saddle brand and model, shoe size and width, and perhaps handlebars have been selected and optimized, and will remain so forever. Dimensions such as frame size, stem length, and saddle height are “set” and do not change. These beliefs are incorrect. 

Why? The human body is always responding to total physiological load. This means as riding volume or intensity changes, off the bike movement practice evolves, life stress changes, work stress fluctuates, aging occurs, dietary philosophies are adopted or abandoned, you walk more or less, decide to take yoga classes over the winter…your muscles, fascial relationships, and movement patterns also change. This means your relationship to your equipment changes. Shoes that you use for five seasons in a certain brand and size are no longer rideable, they hurt your feet. A saddle you used for three seasons without noticing it becomes a bed of nails. The saddle height you rode since you were 18 is now too high, or the stem seems just a bit too long / a bit too short. These are just common examples.

Bicycle fitting is a process, not an outcome. 

In reality, bicycle fit is an ongoing process, as the human body is always changing and adapting to the total physiological stress experienced by the organism. Thus, our relationship to our equipment changes. One of the thing that makes cycling a unique sport is the intimate relationship we have with our equipment; a runner simply does not have the same level of engagement with their kit that we do. Part of the practice of cycling is having an understanding of that relationship and managing it according to the evolution of our practice. 

This might mean a seasonal check in with fit is ideal, or a rider may need to have a fit tune up with greater frequency. For most athletes who ride a lot but move in balance and are injury free, an annual rhythm is optimal in my experience. 

Bicycle fitting as a process also means that some aspects of bicycle fit are relatively set in stone, while others are in fact trial and error. This is true regardless of the experience, knowledge or training of the bike fitter. 

Why? Some aspects of fit are best sorted out on the road or trail. For example, you can’t figure out how the handling of your bike has changed while it is locked in a trainer in a studio. Some changes, such as saddle to bar drop, may be placed within a certain window. Where specifically the bars end up in that window depends on the rider’s experience over time, with an allowance for adaptation, which can happen over weeks or perhaps months. Decision parameters may include handing on steep descents, lower back discomfort on climbing days, or tightness in the anterior aspect of the hips. After an adequate adaptation period it may be necessary for the fitter to see how the rider’s posture has adapted to the changes made; these changes may or may not be favorable. From this point, a decision can be made. 

Perfect Fit for Me

Similar but importantly distinct from the One and Done misconception, the Perfect Fit for Me is the idea that there is one of everything that is perfect for you, and that bike fitting is a quest to find this perfect solution.

Hypothetical example: in the past a an athlete has ridden a bike with a saddle height between 718 and 726mm. At times 718mm was ideal but at other times it seems too low or there is uncertainty about what is “right”. There are confounding variables: sometimes a higher saddle feels better [more power?], but lower back pain results on long rides. The belief: there is one saddle height in the universe of all possibilities that is perfect and optimal, and will lead to the ideal expression of power or VO2 max.

If you buy into the idea that anyone with a lot more education than you are is a guru, then you believe that finding these solutions is simply a function of hiring the fitter with the most experience or letters after their name, and this person will tell you what your optimal, perfect and forever saddle height is. 

This idea is incorrect. The concept that there is one perfect saddle height [or any other dimension to a bicycle] that is the illusive perfect solution for a rider is an expression of perfectionism that has no foothold in reality. A best performance or highest expression of speed on a bicycle over a given duration is not a function of finding perfect fit dimensions and then honing to them; it is of honing the rider to relate to the machine in a way that allows expression of this potential. To do this, the ride must be trained to be very rigid and direct, like wood, and also to be flexible and durable, like water. 

Even on a precisely manufactured machine such as a modern bicycle, nature will find a way to express the relationship of rider and steed as perfectly imperfect. 

Generally, the more often a rider has niggles or minor injuries as a result of equipment changes, the more they need a movement practice that will bring about more durability and less fragility. This practice will by definition offset and compliment the movement patterns found in cycling. 

While the fitter [ostensibly] has the expertise and knowledge to make certain decisions and guide fitting choices, and this is invaluable to the success of the fit work, there is one area that no amount of education or experience can ever surpass. 

The expertise the client has of inhabiting their own body is indisputable. The authority the client has in this domain is indisputable. 

This is to say that the fitter can never tell the client what feels good or bad, what saddle will work or what saddle to bar drop feels right. Only the client can determine this. 

The fitter is an interpreter of information, sensation and feedback from the client. The art and experience help a fitter interpolate this information and use it in a constructive way to improve the relationship of the client to the bicycle. 

At times, the client may misunderstand their sensations and a tinkering client may find themselves way off the mark of optimal fit as a result of these. Self practiced bike fit is a train that is ripe with opportunity to get off track. In this case, the task of the fitter is to bring the client back to center. 

This may mean asking a client to tolerate a type of discomfort in the short term to weather the storm of adaptation; it may also mean asking a client to immerse themselves in functional work to restore movement patterns. 

Bike Fitters are Wizards and Know Everything 

This belief is that the fitter is the grand wizard and can solve all problems with his wrench and goniometer. This is incorrect. 

While there are some aspects of bike fitting that are firm recommendations, as stated above, much of it is trial and error, even for an experienced fitter. Why? Because of the fractally complex individuality of the human being.

There is only one rule in bike fitting: There Are No Rules in Bike Fitting. 

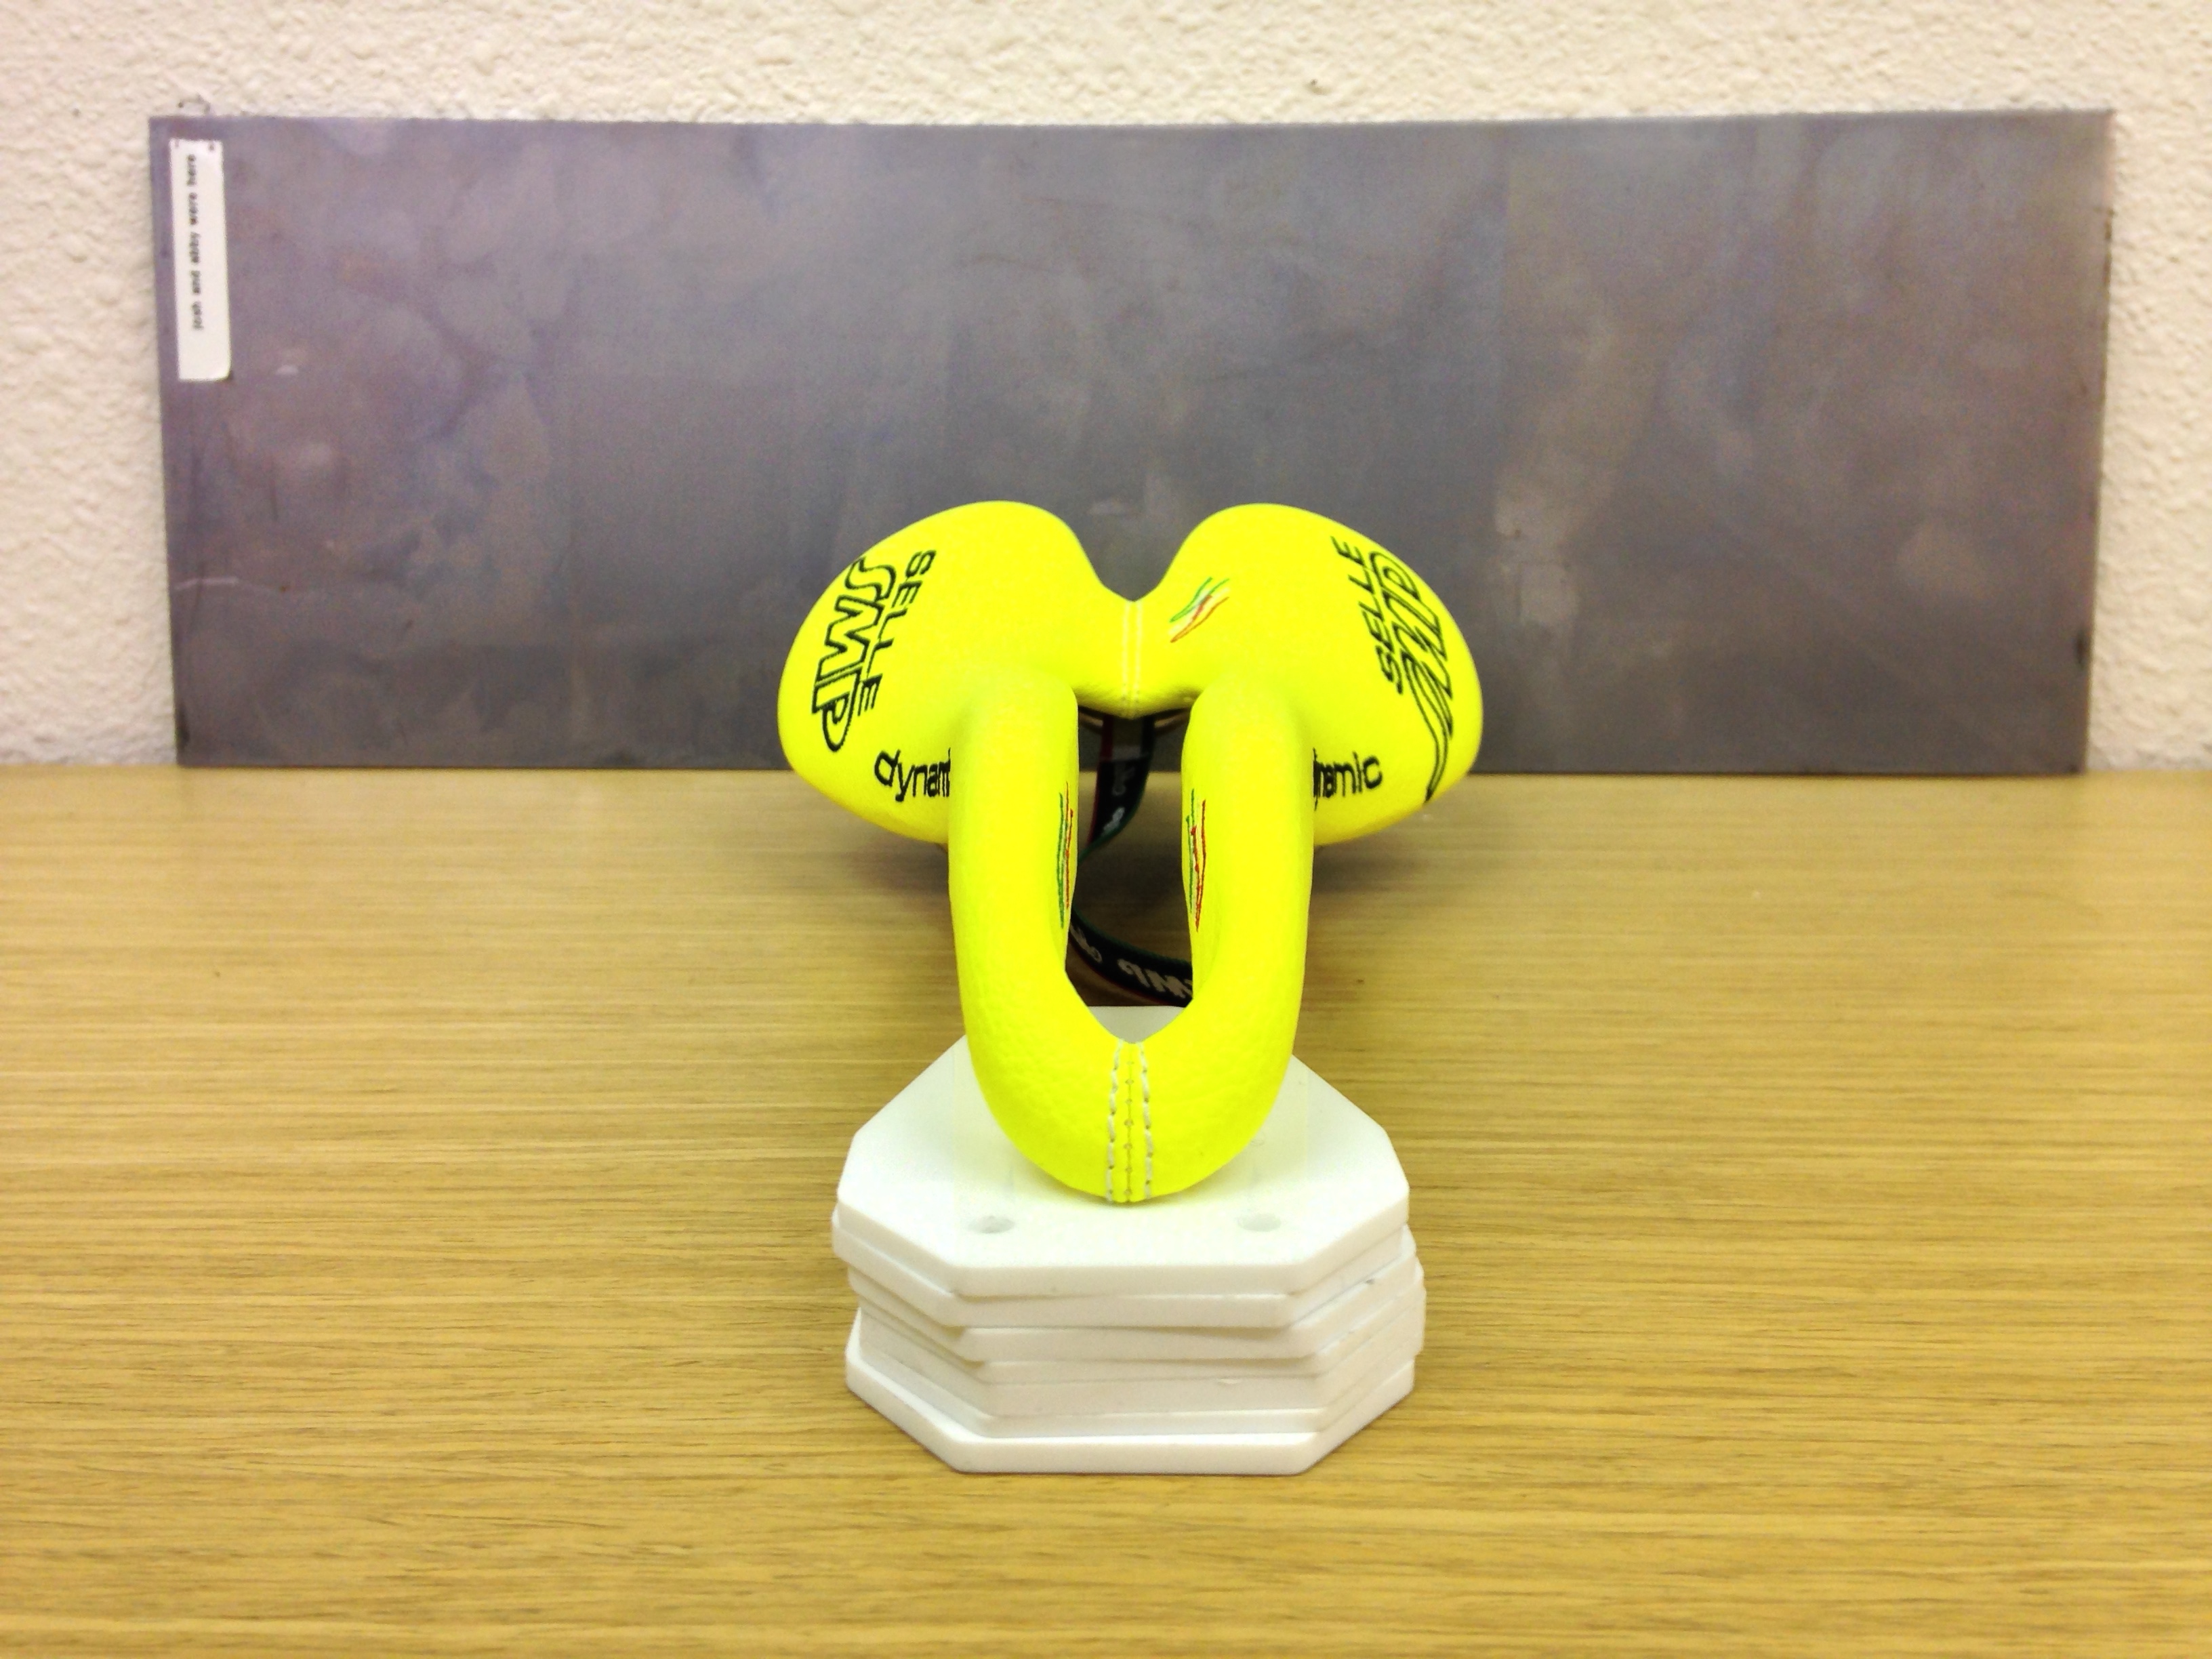
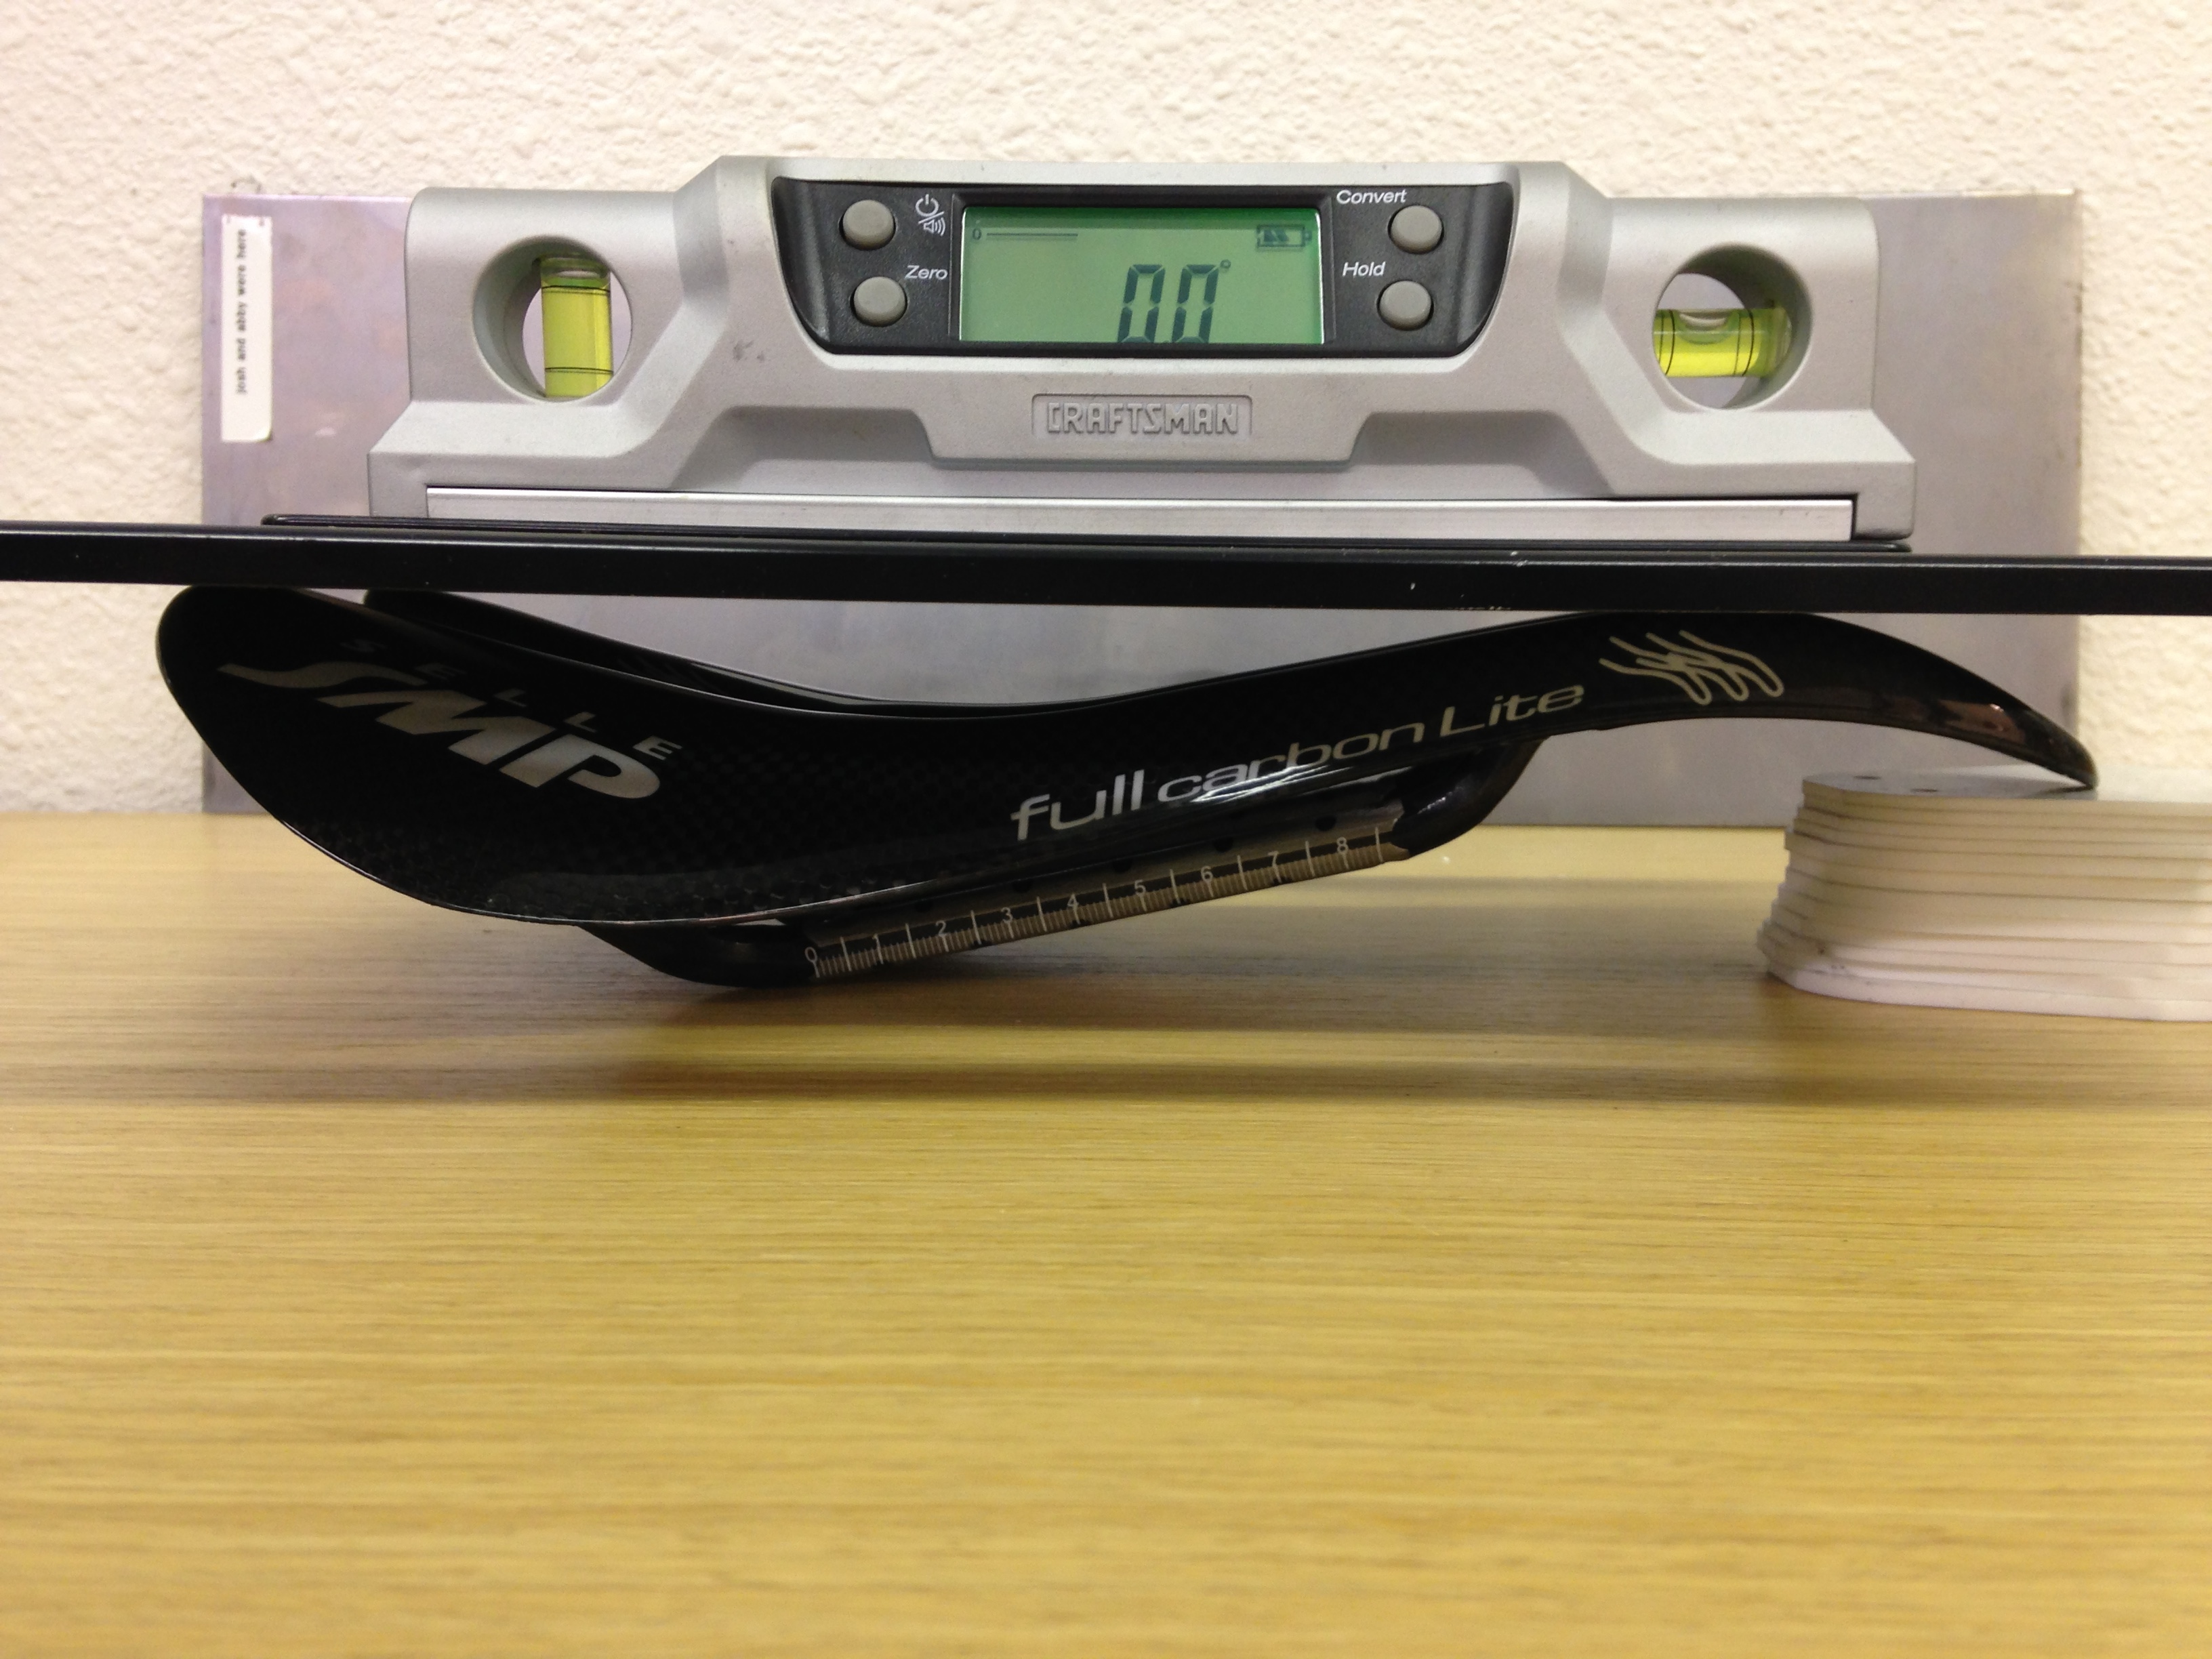
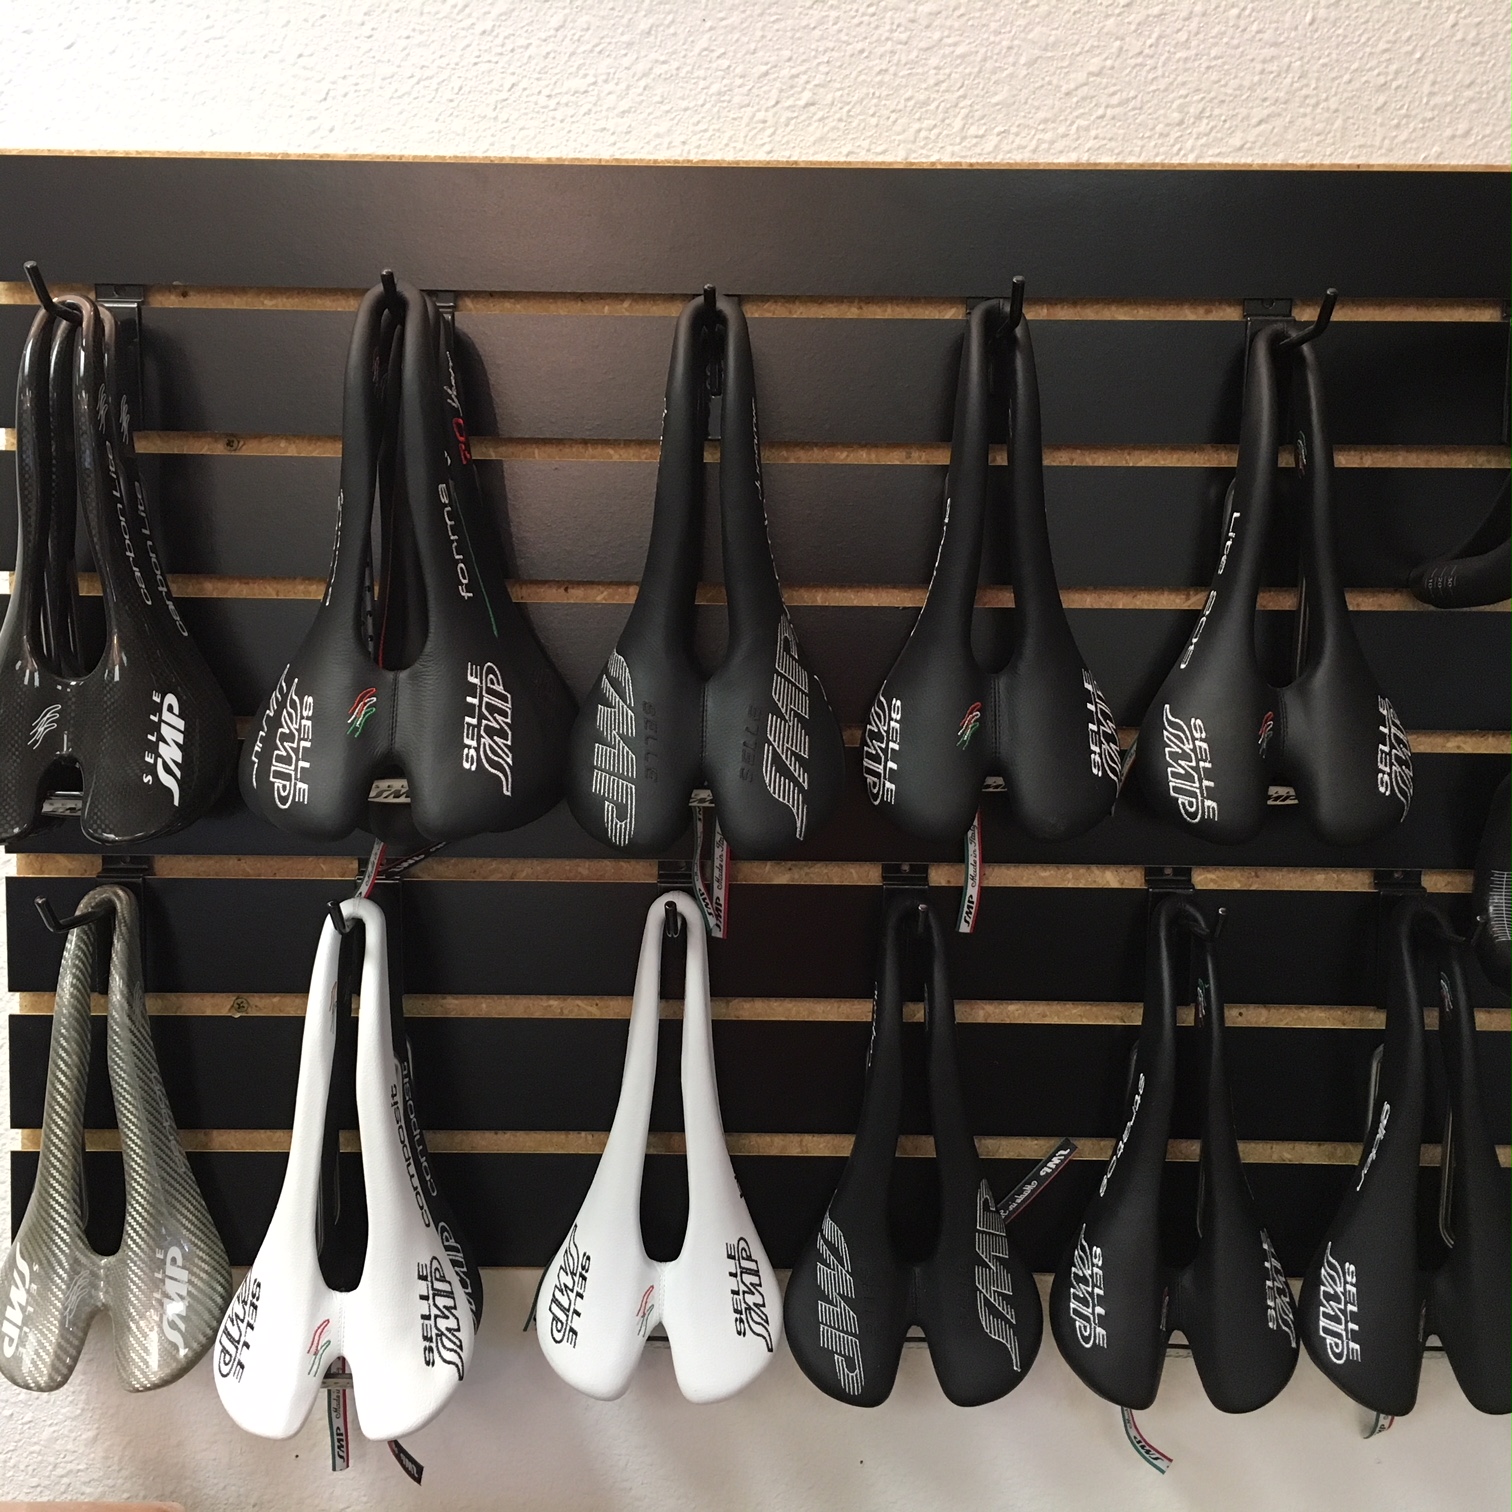
This is another way to say that Bio-individuality Rules Everything. One person’s perfect saddle of fluffy heaven is to another person a pile of screwdrivers. This is true for every choice in fitting and while there is some equipment that can work for many people, this is not because people are similar or the same; humans are in fact far more different than we tend to think [one of my favorite examples can be read here]. It is because humans are really adaptable, and because some pieces of equipment are quite well designed [while many are total crap]. 

Time trial bikes are a great example of this concept as well. Often riders come to a fit hoping to optimize aerodynamics. While a fitter can speculate, and a good filter can likely get close, there is no way a bike fitter can optimize the aerodynamics of a rider without testing their CdA before and after changes, and accommodating adaptation to those changes as well [something a wind tunnel cannot do in one session either]. Riders need to have realistic expectations as to what a fitter can accomplish, based on the resources they have. 

In truth, the same can be said of a rider who wants a fitter to optimize their performance. Most riders will conceptualize improvement in the best power they can average over a 20 minute maximal effort. This is only one of hundreds of ways to quantify performance on a bicycle but because it is orthodox and relatively easy to measure, riders and coaches have agreed it is a critical benchmark, in spite of the fact that very few races have these precise demands. Because there are so many ways improved fit could help a rider be faster [better cornering, better efficiency, improved comfort, to name only a few] quantifying how a fit influences performance is quite challenging. 

The true litmus test of the long term success of any fitting journey is the steady improvement of the performance of a rider, enduring comfort, and minimal or zero injuries. Injuries in this case is both referring to acute joint or muscular problems as well as lingering aches, soreness, or recurrent pains that limit performance on long hard days. 

All Suffering is Good

Endurance sports, cycling in particular, glorifies suffering. We pedestalize the idea that one rider can suffer to win the “road race of death and destruction” above all others. This tired old belief system persists today, in spite of years of misguided training and misconceptions about equipment as a result. 

Every human, even the toughest bastards, have a limited capacity for suffering. When we put all suffering in the same box, we do not distinguish between sore legs from riding 160KM and numb genitals from a poor saddle choice. We do not distinguish between burning lungs from intervals and sore feet from shoes that are 1.5 sizes too small. This is incorrect. 

By choosing equipment that allows us to focus on the task at hand, we protect our bodies, we protect our health, and we allow expression of our highest potential. It is time to stop confounding being tough with tolerating all pain and discomfort as a good thing. Toughness is separate from poor bike fit or equipment choice. 

Things I Would Do Differently

My first bike race was in 1988. I was 15 years old, and have been hopelessly addicted ever since. I was a skinny teenager who wore the same sunglasses as Bernard Hinault. The Velcro straps on my cycling shoes dangled and flapped in the wind, desperate to contain the path of wobbly knees. 

Now, I am considered an old man in the sport. My 23-year-old six day partner Daniel Holloway and I jokingly refer to each other as “dad” and “son,” and there is a little bit of truth in every joke. He is young, brash, talented and learning quickly. His hair is thinner in some parts than others, on purpose: he sports an ’80s throwback Euro mullet. I attempt to impress my wisdom upon him through example and instruction. My hair is also a bit thinner in some places than others, but not really on purpose.

Of course, many times my example has failed and the student has seen the flawed side in the teacher. When this happens, I think silently “Do as I say, not as I do.”
Like so many other promising talents I see in the sport now, Holloway is light years ahead of where I was at his age. He has better equipment, better coaching and better tools, such as power meters, training stress scores and shoes that fit [better than mine did].

The beauty of sport is in continuing to discover new things about cycling, refining and expanding my database of knowledge. I find perpetual satisfaction in fine tuning details and making new discoveries. 

After many years, I still love long training rides, pedaling up the driveway wasted and bonking, celebrating every time I see six hours on my computer or every time I crest a climb with searing legs. I still find joy in the raw connection of mind and body that a long ride can deliver.


For me, racing is not about smashing other people into the dirt, crushing my competitors, or beating my chest in triumph. It is about overcoming the adversity of the road, mountain, weather or hunger, and my own internal obstacles. It is about mastering the sport at the highest possible level. It is a challenge I continue to enjoy to this day.

THINGS I WOULD DO DIFFERENTLY


I offer these thoughts in the context and knowledge that my journey in cycling was perfect and unfolded exactly as it should have, however unspectacular the results of that journey may be relative to the world stage. That is to say, I don’t really wish I could “do things differently” because this mindset is incorrect. Fantasy land historical revisionist history is the product of the modern mind, trapped in a culture that idealizes perfection and output, which is partially an outcome of drowning in content and information, and gives us a constant sense that we are not doing enough, that we are not enough. It’s a mindset that created the Marvel multiverse and that induces anxiety in many younger generations. 

I offer these thoughts simply to inspire younger riders [that is: cycling age, not chronological age] to consider their path in the sport and make choices with authority. 

  1. Hire a coach. I spent so many years trying to figure out the puzzle of training. I oscillated between extremes: Type A capacity for overdoing it versus my internal fear of overtraining. What I needed was someone to call me out on my own shortcomings and push my boundaries. My best seasons were definitely the ones in which I did hire a coach. A good coach is a mirror that reflects what we cannon see in ourselves, and this is the path to true growth. I also held a belief that I had to do it on my own, that hard lessons were the ones I had to teach myself. As one of my best teachers recently reminded me: Bees don’t make honey alone.
  2. Upgrade as slowly as possible. When I was a junior, there was an unspoken race to become a Category 1 as fast as possible. This was a mistake. Take your time and delay each upgrade as long as you can. The best place to learn how to win races is at the top – the top of each category. If you don’t learn how to win in the lower categories, how will you when racing against the pros? Take your time in your path and learn as you go. 
  3. Don’t limit your potential. For the first few years, race as hard as you can. When presented with any “yes/no” question: Should I follow this attack? Should I go hard in this time trial? Should I force the pace on this hill? Should I sprint for this prime? Answer YES. If you follow this rule initially, you will craft forward thinking, aggressive racing habits, and you will learn much more about the limits of your body and your competitors. Don’t worry about hiding your cards and being patient, that comes later.  Don’t worry about crafting a perfect resumé, this is an illusion and if you are good enough to win worlds, it won’t matter what place you get at a local criterium. If you get shelled because you left it all out on the road, that is fine, you are in the learning phase of your sport. For now, when you see opportunity, pull the trigger. This is the second stage of learning, known as Conscious Incompetence in which the fastest path to growth is to simply have as many experiences as possible. This will accelerate your path to the next phase of learning.
  4. Be fitted by the best and check your position. This might seem self serving because I am a bike fitter, but that doesn’t make it not true. So many times riders give up performance or become injured because they are riding a saddle which compromises their pedaling, or their seatpost has slipped, or a cleat has moved during a crash, or their position has changed because they were not careful when they transferred measurements from the previous bike. Go to a specialist, get fitted, mark everything [a silver sharpie is the most useful tool you can own], record everything so you can reference any changes and use the measurements for any new bike build. Memorize your saddle height to the millimeter, and know your other critical dimensions. Managing equipment is part of the craft of cycling, don’t be the rider who doesn’t know their own saddle height or what saddle offset it. 
  5. Be disciplined about your hard days and your easy days. Cliché but true: If you want to get better, your hard training days must be hard. And in order to really improve yourself, your easy days must leave you fresh enough to really suffer on your hard days. Don’t let ego ruin a rest day. Discipline is also about keeping the tiger under the hood on your easy rides. A true professional never lets another rider dictate his training pace. This is known as Intensity Discipline and it is a critical characteristic of any rider who will advance in the sport. 
  6. Cultivate an off the bike movement practice. I spent many years trying to figure out how to bulletproof my body from injury so I could handle a higher training load. For many seasons I suffered lower back pain, knee pain, and sometimes shoulder pain and saddle sores. Some riders seem to be blessed with a bulletproof chassis, but I definitely was not. After 35 years in the sport I can now ride pretty much as long or fast as I want, without pain or discomfort. This journey has been very rewarding and also has allowed me to help many other riders on the same path. If you are riding and only riding, be aware: cycling does not create a functional, healthy body over a long timeline. In fact, it frequently causes movement pattern disruptions from repetitive joint motion in limited ranges and planes that will eventually lead to dysfunctional athletic abilities. If that sounds confusing, the takeaway is: cycling screws you up, and to avoid this you must move your body in different ways that you move when pedaling. It is critical to offset the patterns of cycling in order to avoid this trap and express your highest athletic potential. 

Hour Record

A bit of history, if you care

Sometime in 1994 my training/sparing partner Jonathan Vaughters [I usually won the sprints and he always won the climbs] suggested that I try and set the US hour record. At the time it was held by legendary time trialist John Frey at a distance of 49.404KM. This was in a special era of time trialing in the US; a select group of riders had highly specialized bikes that were the product of paper engineering, like a conventional bike that has been squashed in a vice. They had razor thin forks, tiny CNC machined brake calipers, top tubes that sloped at extreme angles, and seatposts that were about 10x as long as they were wide. Riders all wore long tailed aero helmets and panty hose on their heads to contain their hair.

Time trial culture was a subset of road racing that has it’s own devoted tribe, and riders based their seasons around timed events and setting US records at various distances. This era has long passed and this genre has nearly gone extinct.

In September of 1995 I set the Elite US hour record in Colorado Springs, CO. Jonathan and his girlfriend helped me keep track of laps and called splits. I rode 50.191km in one hour and also set the 10km, 20km and 50km US records along the way [USA Cycling used to recognize these as separate record points but nobody cares about these details now]. The previous record was held by John Frey [49.404km] and was also set in Colorado Springs, which is a concrete outdoor 333.3 meter track.

I was pretty decked out for 1995. Aero equipment today does not get leaps and bounds faster, with the notable exception of my skinsuit and helmet. The full carbon Lotus frame was light years ahead of most other bikes in that age. I had an aero front wheel with a deep profile and wide rim, and my position had been refined in the wind tunnel. I used a 55×14 gear and averaged close to 100 RPM. My average power, recorded with a SRM power meter, was 311 watts. My drag was measured in this position at Texas A&M at around 4.6 lbs @30 mph.

The track is 6035 feet / 1840 meters above sea level and is still functioning today, although it has been covered by a massive dome now. Local riders struggle for access to the facility as it is mired in layers of red tape. The facility is owned by the US Olympic committee, an organization that is the definition of a modern entity that is ostensibly for public service but is in reality ruled by an undercurrent of litigious fear. They seem far more concerned about being sued than serving the local rider population.

In 1997 Norm Alvis broke my record and rode 51.505 km. I tried to take it back later that year and was ahead at 10km but fell behind by 20km and abandoned the attempt.

In 2013 I trained for another attempt on the US record and rode 49.806km. I trained the entire season with the attempt in mind but after a storm delayed the construction of the Boulder Valley Velodrome, I was forced to move the ride to Colorado Springs. I intended to try the record at the end of September but then came more weather challenges, in the form of 1000 year level floods in my home town of Boulder. After week of not riding and dealing with our house, which had considerable water damage, I almost decided not to ride. The entire city of Boulder had an apocalyptic feel, there was water everywhere for days and furniture floated down major streets after being liberated from storage units or living rooms. With some reflection I realized that preparation for this ride had taken a lot of time and energy, and I had made a commitment to sponsors that needed to be honored, regardless of the outcome. My family had also endured my training and preparation, the least I could do is my best on the track to pay them back in a small way.

Many local roads were closed so training required some creative problem solving. After finding excellent form in the early part of September and a subsequent two weeks of almost no riding, I did what I could to polish my abilities and went for it. Unfortunately, the result came up short.

After half way, I was about 25 seconds (just over one lap) down on the schedule to further Norm Alvis’ distance and then the wind picked up, putting me further off schedule. I rode farther than the world record for the 40-44 age group at that time but the record was not submitted to the UCI as there were no doping control officers present. I did get the USAC 40-44 record, in addition to riding the furthest of anyone in the 30+ categories at the time. As the UCI had recently changed the regulations on bicycles and hour records, for a short time I would have had the Elite World Hour Record had this ride been submitted to the UCI, as detailed in this article:

https://www.cyclingnews.com/news/voigt-hour-record-bittersweet-for-former-us-record-holder-pearce/

This would have amounted to a technicality and my distance would have been beaten and subsequently crushed by athletes with a lot more horses than I have. But it would have been cool to be in the record books in a right time right place kind of way.

One week later I established the Absolute Record [read: Merckx style] for the US, with a distance of 46.452. That ride was extremely challenging and my bike had some technical issues which contributed to my ride being sub optimal, but it was what it was. I used a Nobilette custom steel frame with Wolber aluminum rims, and custom 34 cm drop bars. Now the UCI has done away with that category, which makes the effort completely obsolete. The reality is that it was an obtuse line to draw in the sand in the first place and it never made sense to try and turn back the clock on an effort like this. Nobody wants to see riders time trialing in drop bars for an hour with spoked wheels when we have tools like disc wheels and aero bars at our disposal today. I am glad the UCI has moved on. I can say this because I was stupid enough to sign up for it…

Fittingly, I don’t have a single photo from either 2013 attempt. It was as if all of it never happened.

Fast forward to September 22, 2018 I set a 45-49 World Masters Hour record in Aguascalientes, MEX. The previous record was 49.3KM held by Kent Bostick, set in Manchester England in 1999.

Colby Pearce hour record Aguascalientes 2018

The final distance of 50.245KM was 54 meters farther than the distance ridden in 1995, which was 50.191KM in Colorado Springs at the age of 23.

Some of the increased distance can be accounted for by superior equipment, but most of it is the ridiculously fast venue of Aguascalientes, MEX. This track is so fast, it should probably be illegal. Just get on your bike and you are going 40km/hr.

Equipment notes 2018 Hour Record (Aguascalientes MEX):

  • Bont Zero+ shoes
  • PTI carbon orthotics
  • Speedplay zero pedal
  • Ceramic Speed optimized Dura Ace chain, Ceramic Speed bearings
  • Enve SES aero base bar with Speedshop 51 extensions and custom made carbon pads
  • SRM Origin crankset
  • Sugino Zen chainring and SuperZen gold plated cog
  • Mavic Comete front and rear discs, with Vittoria Pista Speed tires
  • Giro Aerohead helmet
  • Panache Cyclewear Speedsuit

For a great interview with some other details, see this page:

Colby Pearce Aguascalientes 2018

A complete list of recognized hour record distances is regularly updated by Mike Mowett on Wikipedia and can be found here:

https://en.wikipedia.org/wiki/Hour_record

This page is well maintained and has all the current distances.

The Spectrum of Sugar

The spectrum of sugar: a discussion of fueling for rides, training, and racing performance.

While writing this article I am returning to the US after our first Team EF Education coaching camp in Beuda, Spain [March 22]. The weather was not amazing for this camp, we timed it perfectly to coincide with some of the coldest and rainiest days the region had experienced in months. In spite of this we had a very productive and fun camp with lots of teaching moments. I ended up with nearly 23 hours of riding in 5 days on some of the most beautiful roads in the world, met some great people, stayed at a super nice property and ate great food, so there is nothing to complain about.

We worked on many aspects of cycling, but one of the topics most frequently discussed was fueling and hydration for hard training rides. My Team EF Coaching colleague Zack Morris was on a mission to teach our riders how to fuel for this type of riding. The types of rides most often done during this camp were steady aerobic endurance pace over rolling terrain, with climbs of 45 min at race pace in the second half of the day. These types of efforts require a very specific fueling strategy in order to maximize the benefits this training.

Many of my listeners may have heard me speak unfavorably about the use of gels and mixes during training on my podcast, and I am not here to reverse my prior statements. However, this camp has helped me reflect on my position and refine my teachings, something I will continue to do until my time on earth comes to pass.

How I am thinking about fueling on rides currently looks like this: all cycling requires fuel, and the type, quantity and timing of the fuel depends on the type of riding you are doing, and the outcome goal you are working towards. Just like most everything in life, there is no “either/or” in the paradigm of fueling, it is a spectrum of choice and outcome. The spectrum is made of two polarities: on one end we have rides that are low intensity and on the other end of the spectrum, we have rides that are high intensity. The best way to explain this concept is using a bi-axial graph, which gives us four quadrants. On the X axis [horiztonal] we have rides which are low intensity [to the right side] and on the other end of the spectrum, we have rides that are high intensity [on the left side]. They Y axis [vertical] is made up of short duration rides at the top and long duration rides at the bottom.

High tech graphics by Me.

This gives us four quadrants which characterize our rides: long duration and high intensity would be the lower L quadrant, while short, low intensity rides will be the upper R, and so forth.

Here are the fueling rules: the more intense a ride is, the more carbs are needed for fuel during the ride, and as we get to the extreme end of the spectrum, the fuel needs to be straight up sugar. Specifically, a mix of different types of sugars, as a blend will help with gut absorption. Avoiding the use of only one type of sugar, specifically fructose but sometimes other sugars, is usually a good call as fueling with only one sugar can sometimes cause athletes gut problems.

The lower the intensity, the less carbohydrate we can get a away with, and the less sugary these carbs can and ought to be consumed, from my perspective. I will address why I am of this opinion below.

Rocket Fuel vs Diesel Fuel

If you want to run the engine with the throttle wide open, you have to put rocket fuel in the tank. This means sugar. When we say wide open, we are talking:

– Maximal effort intervals of any where from 8 seconds to 30 minutes, but in particular durations of 3-20 minutes or shorter bouts of repeated efforts

– Anaerobic Threshold / FTP / MLSS work

– “VO2” or efforts that bring you to the point of maximal oxygen consumption

– Anaerobic or glycolytic intervals

– Hard group rides with race simulations, pace lines, or maximal effort climbs

– All racing including time trials, criteriums, road races, hill climbs, etc.

These events or efforts are on the  L side of our spectrum. As the duration increase, the need for carbohydrates is simply calculated in grams / hour, and the number of hours is multiplied by the grams per hour to get the total amount of carbs required for an athlete. More on formulas and why they don’t work, below.

All of these events use a significant contribution of energy from the glycolytic energy system and this system burns glucose as fuel. This simplest, fastest and most effective way to get glucose in your blood stream so it can get to your muscles is by consuming sugars. Sugar = rocket fuel. Specifically, the rocket fuel that is currently all the rage is glucose – fructose blend at a ratio of 2:1.

Rocket fuel is made of up both “sports” foods and not “sports” foods:

  • gels
  • mix [that contains simple sugars and possibly complex carbs, but not protein]
  • candy that is mostly or all sugar like gummy bears, Swedish fish, etc

If you want steady performance on the bike, at sub maximal intensities [below FTP or MLSS or anaerobic threshold] then you may consider fueling with more “diesel fuel” as opposed to rocket fuel. There are advantages to using this type of strategy, and this is why it is important to distinguish between the types of riding you will be doing and what type of fuel you will use.

“Diesel fuel” can be ride fuels that have complex carbohydrates and also other macronutrients [fats and proteins] as well as fiber. The lower the carb content the more “Diesel” they become. Examples:

  • fruit and nut bars
  • protein bars
  • peanut butter and avocado sandwich
  • hot dogs [ask JV about the time he ate a hot dog in the middle of a ride to see the General Sherman Giant Sequoia with me for a good story]
  • beef jerky
  • bananas or other fruits such as figs

These are all examples of foods that would have more diesel characteristics than rocket fuel characteristics, and these types of fuels would be better for rides on the R side of our intensity spectrum, and towards the bottom [longer duration]. For shorter rides that are light intensity [upper R quadrant] we don’t normally need fueling [this is context dependent, sometimes a rider can be training very hard and need a bit of food even for a recovery ride].

A note on bananas: these are considered by some to be “nature’s energy bar” and Rigo rode to a podium at the Tour eating about a dozen bananas a day. That said, this quantity of fruit sugar or fiber may not work some athletes. However, bananas might work better than many other fruits.

You can also select foods that are what we might call “middle of the road” foods that split the difference. These might include:

  • rice cakes
  • rice balls with egg, prosciutto, etc
  • waffles
  • granola bars
  • any type of high carb processed food bar [like an old school Power Bar]

In planning your ride nutritional needs, you can select foods that have a higher fat and micronutrient content in order to offset the simple sugars you consume during higher intensity days on the bike. Rocket fuel gets the job done when you want to ride as fast as possible, but these are also empty calorie convenience foods, and this is one big reason why I don’t recommend riders train with gels on days when they are not doing maximal efforts.

If you are headed out for a 3 x 15 workout at maximal pace, some mix in your bottles and some gels in your pockets may serve you really well. If you are not fueled for this intense work, it may not just make the work harder, it may make it impossible for you to hit the prescribed intensity.

However if you are riding for two hours at steady aerobic endurance pace, or doing a 160km long road ride which will be mostly low intensity and have a long coffee stop, it may make sense to use only a bit of mix and some foods that are more middle of the road or straight up diesel, depending on what your ride goals are.

For rides that will be of mixed intensity, consider a split approach to your nutrition: some mix, maybe a gel or two, and some middle of the road foods.

Manipulation of macronutrients can influence fuel usage during a ride: consume more fats, burn more fats. Consume more carbs: burn more carbs. Thus, if you want to up-regulate your fat metabolism and carbohydrate sparing on the bike, consuming a low carb breakfast with a higher fat content will help with this objective.

Likewise, if you want to perform at a competitive level in events that require high output, training on your interval days with the same fuel you will use for your races will enable you to know how your body responds to these fuels, as well as train the enzymes necessary to utilize high quantities of sugar in the muscles. Both of these aspects are necessary for optimal performance on race day.

That said, any rider who wants to perform over long events such as road races or gravel races needs a balance of fuel sources available to generate energy. This means each of these “energy pathways” must be trained at some point. If a rider simply consumes sugar and goes hard all the time, eventually they may compromise their ability to burn fat at lower or medium intensities of riding, which is a fundamental component of cycling. It’s easy to watch the Tour and see the finale on the big climb and equate the winning rider as the one with the highest threshold power [or w/kg if you are thinking a bit more] but that performance was built on weeks and months of training at lower intensities that were fueled by fat, specifically to spare the rocket fuel for that final, magic 22 minutes of maximal effort that makes such electric television.

Likewise, if a rider goes full keto for months and the shows up to a criterium, it is very likely they won’t quite have the glycolytic engine or lactate buffering to perform at their best. We have to fuel for and be trained for our event.

Takeaway: there are dogmatic people on both sides of this fat vs. sugar spectrum who are convinced their way is the only way and who will fight you to the death with a pile of science and anecdote. That is real neat but the truth is, extreme behaviors in sport [or anytime in life] result in extreme consequences and when the pendulum swings too far out of balance, it eventually swings back. This is natural law. Sports people are often guilty of “if some is good more is better” mindset. I am not here to tell you what to do but I do know what happens when extremes are chosen over long time periods. If you are thinking “yeah but not me” or “I can get away with it” or “I have to because I am not that talented”, feel into your expression of the Hero or Victim archetypes for a minute and then come back to center.

Ultimately, everyone is an N of 1, which means you will have to experiment and find out what fuels work for you. One rider’s rocket fuel can be another’s kryptonite. It is definitely optimal to avoid kryptonite on race day.

About 15 years ago, 50-70 g/hr of carbohydrate was considered the standard; today riders are commonly targeting 90g/ hr, with some riders pushing the envelope of extremes:

https://blog.supersapiens.com/ronan-mclaughlin-scales-the-everest-of-fueling/

See the note above on N of 1 in regards to how many grams per hour of sugar you can ingest on hard rides. The trend seems to be; if the gut can handle it, the more you put in the faster the rider will go.

One point that can be confusing is the topic of insulin response to sugar intake. Our moms told us not to eat too much sugar for good reasons: it is horrible for your teeth and also will cause an insulin response, as the body works to regain homeostasis in the levels of sugar in the bloodstream. Repeated swings in insulin and blood sugar are associated with many health problems, not the least of which is weight gain. However, once an athlete is riding, the insulin response is severely reduced or completely eliminated, again based on where you are in the spectrum. When a rider is 3 hours into a hard ride, any sugar that comes into the blood stream will immediately be burned for fuel. This means the blood sugar levels won’t rise high enough to generate an insulin response, which is the cause of the “crash”. The old saying is “When the furnace is running really hot you can throw almost anything in.”

Listeners of my podcast will also understand I am very cautious to recommend formulas for anything. This is in part because I have tried to apply formulas many times in my racing and found them to give me unsatisfactory results. So, while you might be temped to start adding up the grams of carbs and to glue yourself to a formula, this choice might simply invite a deeper level of understanding through some unpleasant experiences. The way I think about it is: formula is a starting point for learning but following it dogmatically or without critical thinking will be self-defeating. A formula must always be utilized in context.

As an example, if you start a road race in 40 deg F weather with light rain, your fueling needs will be completely different than if you start the same race in 94 deg F, sun, and 90% humidity.

In my experience, there are several factors that can influence the response to caloric intake:

Temperature

Humidity

Intensity

Duration

Acute caloric load

Phenotype of the rider: glycolytic vs aerobic

The last one on this list is not trivial: the dominant muscle fiber type of the athlete will influence the fuel utilization and requirements during rides. To illustrate this point, consider an example two riders of identical weight and CdA; however one is a classic “sprinter” and the other a “time trialist”. The later will certainly have a higher percentage of slow twitch fibers in their muscles which will run more effectively off a higher fat percentage than his sprinter riding companion. For the same average power and the same number of KJ’s of work, the sprinter will burn and require more carbohydrate than the time trialist. This is because even with the same thresholds, at any given intensity the sprinter will be using more glycolytic energy than the time trialist, and thus require more carbohydrates to ride at the same pace.

Thanks for reading.

Pedal fast, pedal consciously, pedal smooth.

Cadence vs Torque

Cadence and Torque: what are they? Why do we care?


Cadence is a critical part of your performance on the bike, but you may not know it.


Belgian superstar Eddy Merckx, the greatest champion ever known in cycling, once gave a talk at a schoolhouse, presumably in small town many years ago. An aspiring young rider asked him, “Mr. Merckx I want to win my local time trial and be just like you when I grow up. Should I spin a big gear slowly, or a little gear quickly?” Eddy replied “Excellent question young man. You should push a big gear quickly.” Mr. Merckx was alluding to the relationship between cadence and torque, which is how we make power on a bike**. The interplay of these two variables determine a rider’s power at any given instant during riding.


In order to understand more about what power is, it is useful to break it down into principles, understand what these principles are, and how they relate to each other.


Power is Force multiplied by Velocity. The amount of power made can be measured in any physical activity [rowing, lifting weights, running, etc]. Power is simply how hard we push multiplied by how quickly we push. Another way to think about it is that power is a product of the strength we use and how quickly we use it.


Because we are making power in a circle on a bike [pedaling] we change the terms slightly:


Force in a circle is called torque.

Velocity in a circle is cadence.


Thus, our formula is: Power = torque x cadence. The question becomes, how do we make more power? This is where Eddy’s story applies: we can either:


  1. Increase the torque [assuming cadence stays the same]
  2. Increase the cadence [assuming torque stays the same]
  3. Increase both at once [increase both torque and cadence simultaneously]


#1 is equivalent to “pushing harder”. #2 is equivalent to “pedaling quicker”. #3 is doing both of these things at once.


Note that in order to accomplish #1, either the grade of the road has to change such that an increase in torque is required. Example: the rider has to begin climbing, maintain the same cadence, but push on the pedals with more force. Second example: on a flat road, the rider can shift to a bigger gear and push with more force but keep the cadence the same.


Note that in order to accomplish #2, the rider has to maintain the average torque over each complete pedal revolution, but increase cadence. This could mean that road grade does not change, the rider does not shift, but increases cadence with the same force on each stroke. In order to accomplish this while climbing, the rider may have to shift to a smaller gear.


In order to achieve #3, the rider must both push with more force and pedal more quickly. This is how a rider makes more power on a track bike, which only has one gear: both must happen at the same moment. In contrast, a rider on a geared bicycle can shift gears to keep cadence in a particular range while increasing force. Thus, riding on a track bicycle can require a greater range of abilities to produce high torque/ low cadence power as well as high cadence / low torque power.


It is fair to say that most riders associate making more power with pushing harder on the pedals. This is probably why more riders report that it is “easier” to make more power on climbs than on flat or downhill roads. This sensation is due to the proprioceptive input of the pedal: as a rider climbs, he or she works against the same forces found on flat terrain [such as the coefficient of rolling resistance as the tires roll on the road surface, the friction of bearings and the chain interacting with chainrings, cogs and pulleys, and wind resistance which is a combination of moving though the atmosphere as well as working with or against the phenomenon of weather], but the force at the pedal changes perceptually due to the additional load of working against the force of gravity to gain altitude. The steeper the grade, the more the rider works directly against this force, effectively moving their center of gravity away from the center of gravity of the earth. in spite of the fact that wind resistance will go down on climbs in most instances, the load on the rider will go up as the grade gets steeper. This is why it feels like the pedal are harder to push down on a climb; the additional work done to overcome the force of gravity adds to the rider’s workload.


On a flat road, inertia will tend to keep a rider in motion; this is what the rider will perceive as a sense of ease on flat rides [once the bike is up to speed]. The bike “rolls along” almost on it’s own on flat roads.


As the rider climbs a steep hill, and more force is required to maintain a constant ground speed [as the rider is working against the acceleration of the force of gravity while gaining altitude] the dead spots in a pedal stroke become “magnified”, or more obvious. Dead spots are typically at the “top” of the pedal stroke [around 12 o’clock] and bottom dead center [or BDC, which is about 5:30, or when the crank is parallel to the seat tube]. The inverse is also true: flat terrain camouflages dead spots in a rider’s pedal stroke due to the effect of momentum.


Also note that fixed gear bicycles do the same: they camouflage poor pedaling technique. While riding a fixed gear on the road will sometimes mean higher peak cadence numbers and may help a rider develop supple pedaling motion, the effect of the fixed gear also “pushes” the foot through the dead spots [a point in the pedal stroke where a rider fails to produce positive tangential force on the pedal].


If we think about this for a moment, we understand this has implications for a rider, given their pedaling technique, local terrain and bike position. A rider who climbs a lot is likely to develop the ability to handle more peripheral [muscular] stress, and possibly to develop a stroke with less dead spots and more even application of power. If a rider is climbing a steep grade, and their pedal stroke has large dead spots or is very “spikey” in application during the power phase, the bike will surge forward on every stroke; this is very inefficient as it accelerates the bike and rider over and over, effectively “see-sawing” up the mountain. Athletes are highly intuitive and while they may not consciously realize it, they may “solve the equation” by learning to apply power more evenly across the stroke over time and with different riding experiences. Competitive situations help bring about these realizations, as seeing your performance through the lens of a ranking will force evolution of the practice.


A rider who lives in a location with mostly or all flat terrain may become accustomed to riding with a pedal technique that has more exacerbated peaks and dead spots. Riding on the flats will allow them to rely on momentum to overcome this technique of power application. Momentum is the mass and velocity of an object having a tendency to maintain the velocity, so once a bike, rider, full water bottles, and all the kit gets going on a flat road, a rider with a pretty choppy pedal stroke can keep speed going pretty well. This is why someone can buy a ten thousand dollar time trial bike, show up to a flat TT and basically axe chop the pedals to death with very sub-optimal technique and still average 27mph. There are two key points to recognize: 1. Bikes are amazing at converting our metabolic energy into mechanical energy. 2. Cycling, more than most other sports, camouflages poor technique, at least to the untrained eye.


To this point, there have been may sport scientists who seem to see only the metabolic side of the sport of cycling and speak about a rider’s efficiency, and thus claim that technique in cycling doesn’t matter. This type of thinking is focused on the amount of oxygen used during a given intensity, or the number of grams of carbohydrates consumed per hour and the resultant average power. There is nothing wrong with looking at a rider from this lens and it can tell us important things about a rider’s performance in a race or training. But to say that technique is a trivial in the outcome of performance cycling is complete bullshit. Bicycles do camouflage poor technique and relative to running [poor technique = injury], cross country skate skiing [poor technique = skier crash] or swimming [poor technique = risk of drowning], technique may play a lesser role in the outcome of a hill climb but this statement largely ignores the role technique has in the mechanical efficiency of bicycles. Just because modern bikes are very stiff in the bottom bracket and drive trains are very efficient in most conditions does not give the athlete a pass to ignore a proper pedal stroke. Just like any competitive sport, final outcomes can be the result of fractions of a percent difference and pedaling smoothly under load can make this difference.


This type of thinking also limits the scope of “technique” to how much tangential force a rider is applying to the pedals, which ignores a huge list of other aspects of riding that fall under technique that unquestionably influence the outcome of a competitive cycling event. These include positioning in a peloton, effective drafting in real world cross wind conditions, cornering, descending, out of the saddle riding, sprinting, using aero bars, becoming more or less aerodynamic dependent on air speed of the rider, eating and drinking while riding, etc.


A physiological impact of climbing is that it emphasizes more muscular, or peripheral stress, on the athlete, rather than cardiovascular, or central stress. This is to say that it places more demand on the muscles, and creates localized stress to the muscles of the legs, in the form of mechanical load and fatigue to the muscle fibers. The fibers become fatigued under the load of producing force, and glycogen is depleted from the muscles.


On flatter terrain, or under higher cadence scenarios, a rider will have more centralized stress on the aerobic and glycolytic energy systems, which will place more demand on oxygen delivery to the muscles, clearance and utilization of lactate as fuel, and systemic metabolic load.


The higher the torque demand is, the more peripheral the load will be on the athlete. The higher the cadence demands is, the more central the load will be on the athlete. Using gears is one way an athlete can manipulate the load to their favor, to a degree, but there are limits. On an extremely steep climb, when the rider is out of gears and cadence is in the low 60’s, demand will be primarily peripheral. On the other hand, in a super strong tail wind or down a long descent, even in the largest gear cadence can exceed 130rpm.


A rider who has trained to use cadence as a method to increase power output will have more tools in the quiver for use over varying terrain. For example, over the top of a climb, if the road flattens before a descent begins, lifting cadence will help a rider accelerate without the need to “push” against a gradient. The same technique applies to tailwinds, false flat down hills, or riding in a good-sized peloton in still wind. A rider who can make a good spectrum of outputs [powers] at higher cadences will effectively negotiate all of these real world scenarios. A rider who is limited to making high power only at lower RPM’s may struggle in these types of circumstances. This can mean getting dropped or being “pinned” in the group – unable to do anything other than hang on for dear life.


Having the ability to generate high cadence at high force also helps a rider respond to the natural changes in pace and accelerations that happen in a peloton.


Below we can see a screen shot of data from a very fast, long group ride of about 160KM. On the X [horizontal] axis, we have power in watts and on the Y [vertical] axis we have cadence in RPM. The graph is divided into quadrants, with the upper right being high power and high cadence. The cross hairs are aligned at the average P and RPM for the entire file [80rpm and 190w, including all the “zeros”]. Each dot represents an individual data point from the file; notice the distribution of dots in the upper R hand quadrant. We can see that a lot of high power data points were generated at 100 rpm and higher, thus illustrating that the demands of a fast group ride: a lot of high force output which is also at high cadence.


Cycling is a sport that is highly subject to the rules of physics: inertia, momentum, aerodynamics, rolling resistance and complex fluid dynamics all play a role in how an athlete performs in an event or how quickly they cover the course.  A rider who can make high power over a variety of different cadence ranges has the depth to perform in a wide range of real world conditions. This is why training at both high and low cadences will help an athlete become more effectively trained to handle the broad range of demands cycling offers, almost regardless of the nature of the event or ride being prepared for.


This old video of Eddy Merckx demonstrates his ability to pedal quickly on rollers:


https://www.youtube.com/watch?v=_BcHekNAfOo


** the Eddy Merckx school child story is paraphrased from my memory. Exact accuracy not guaranteed but you get the point.

*** J Johnson contacted me about this article and helped me explain my physics with greater clarity. I am grateful for his contributions.

Two workout examples for high cadence riding:


1hr:30 min 6-8 X 45 SECOND CEILING BURSTS

Practical Application: training the ability to go at maximum pace for 45 seconds is very useful in decisive competitive moments, or for going fast on rolling or undulating terrain. These efforts target the “extra gear” that well trained athletes have to close gaps or accelerate away from a peloton or small group.

Purpose: Build anaerobic strength.

Focus: make the highest quality efforts possible for these short intervals. Today is about intensity.

Workout:

Warm up for 20-30 min progressing to Endurance pace when ready.

Open:
reps: 1
duration: 5 min
intensity: Tempo
cadence: 100-110rpm target

Flush for 5-10 minutes with easy riding.

Efforts:

reps: 6-8
duration: 45 seconds seated
cadence: 105-120rpm target
intensity: Maximum
recovery: 3 min Recovery

Warm down for the remainder of the ride duration in Z1 at self selected cadence.

Notes:

    • These efforts are about intensity. Make each one maximal, but within the boundaries of good form. The goal is a quiet upper body with little to no motion in head or shoulders.
  • Perform the minimum number of reps within the prescribed range that can be effectively executed

1hr:30m 3 x 8 HIGH CADENCE TEMPO

Purpose: Steady aerobic power at high cadence will develop the ability to maintain constant power while training muscles to be supple and efficient.

Focus: Motionless upper body, constant power output during efforts.

Workout:

Warm up for 20-35 min progressing to Endurance pace as ready.

Efforts:

reps: 3
sets: 1
duration: 8 min
cadence: 110 rpm avg target
recovery: 4 min Recovery between efforts
intensity: Tempo

Cool down with riding in Recovery for the remainder of the duration.

Notes:

  • Steady riding is an important part of these efforts. Try to maintain constant output.


SMP Primer

LOGO SELLE SMP NEWChanging saddles can be a daunting undertaking for any cyclist. Riders frequently use the same saddle for years simply because they find one which is unobjectionable, but far from perfect. The logistical challenges of finding saddles to try without financial investment, and the set up of a new saddle during training and/or competition season is enough to keep riders on the same model for consecutive seasons even when it may not be the ideal choice. The athlete concedes to settling for a saddle that is not a hatchet or a bed of nails, and frequently concerns about optimal support or function on the bike are far from being considered as selection parameters.

As a competitor, fitter and coach, I have ridden and raced bicycles for over 25 years and have experienced many different bicycle saddles in that time. In my opinion, SMP makes the best saddle on the market right now, hands down. The next closest product on the market is the Specialized Romin (it is a distant second) and everything else is light years behind. Some modern saddles are completely antithetical to comfort and performance. I don’t claim to be familiar with every single saddle available for purchase at this moment, but this is what I can say about the rather large number I have seen in person.

There are some saddles on the market which are basically “lessor evolved” versions of SMP saddles. These are saddles with cutouts, but no curvature, or saddles which have cutouts but do not connect at the tip. In my experience, saddles that do not form a stable structure by connecting the two halves on both ends nearly always become warped under heavy use or over a long enough time line.

IMG_2350

Many old saddles (even some still sold on the market today) are relics of ancient cycling culture and should be retired forever, along with down tube shifters, U- brakes and leather soled shoes. Fortunately, as an educated consumer, you can now make better choices, which will enable you to ride more comfortably, with more power, for longer than ever before on a bicycle.

There are several points listed below that highlight why I feel so strongly that SMP has made a superior product. Briefly, these are:

  1. A large central cutout allows anterior (forward) rotation of the pelvis without increasing pressure on the soft tissue (perineum).
  2. A curved shape when viewed from the side more closely matches the contours of the curved ischium (commonly the “sit bones”), which allows both superior distribution of pressure, and increased pelvic stability (both fore-aft and side to side).
  3. The superior support of the bony surfaces allows for less padding, which makes for a lighter more minimalist saddle, improved pelvic stability, and even improved riding technique.

The basic design of the SMP saddle line is to simply mirror the underside of the two inferior halves of the human pelvis (the ischium). SMP saddles are shaped to match the contour of the human pelvis more closely than traditional saddles. The benefit is that this shaping gives you better support; it allows for superior pelvic stability in all planes of movement. The tradeoff is that the saddle must be positioned more precisely. There is less room for error in saddle angle, setback, and height.

I make these statements in the context of human anatomy and function on the bike. Many saddles on the market today do not allow a rider to achieve an optimum position at all, and some only while making serious compromises in health and /or performance. One of my core beliefs as a bike fitter is the basis for these statements: the more stable and supported the pelvis, the more functional a cyclist will be. This means more endurance, speed and power. Not every rider or fitter will agree with or even understand this statement but I am fully convinced it is the truth.

Point number one: The Cutout

Every bicycle saddle, regardless if the rider is short, tall, lean, fat, has a huge butt or no hips, is a male or female, should have a cutout. The soft tissue (perineum, or colloquially the grundel, taint or gooch) must often support the weight of the trunk, arms and head while riding a bicycle on a traditionally shaped saddle. Cycling is an artificial construct and when the weight of the torso is supported this way, the result is often pain, numbness, discomfort, saddle sores, and instability. Fortunately, we have made great progress in this area through minor innovations in the last 10-15 years and it is possible to successfully support the weight of a human trunk in a manner that does not smash your sex organs and urinary tract while riding a bicycle: by creating a saddle which is designed for most of the weight to be borne by the bony structure of the underside of the pelvis (namely, the ischium). The invention of the cutout saddle is as big of a leap in technology as when shifters were moved from the down tube to a combination shifter/ brake lever. Anyone riding an “old school” saddle is stuck in the Flintstone era. Old school saddles, which I refer to as “flat/dome” saddles, are the opposite design of a SMP with a flat profile (as viewed from the side) or a dome shaped profile (when viewed from the front).

arione no logo

A “flat/dome” saddle example.

Why is a cutout so essential? First, in order for a rider to apply maximum power to the saddle, he or she must be able to use the largest muscle in their body to effectively extend the hip: the gluteus maximus. In order to activate the glute effectively, an athlete must be able to at least keep the pelvis in line with the spine during forward rotation. This means the pelvis will be tilted forward (anterior) relative to the horizon as the athlete sits on the bike in moderately aggressive position (or more aggressive). The forward bend happens at the hip, not in the lumbar spine. The glute cannot be used effectively if the pelvis is rotated backwards (or tilted to the posterior) as a rider is sitting on the saddle. But, this is how many riders have sat on a bike for years, as this photo shows:


Roche

Notice the nearly vertical angle of the sacrum (the black part of the shorts).

Of course, it is possible to ride with a forward (or anterior) rotated pelvis in the modern era, on a “dome/flat” shaped saddle. There are riders who do it at the ProTour level today. One of the best examples of this is Bradley Wiggins:


Wiggins

Wiggins is going a better job of rotating his pelvis forward than Roche did, but at great expense to his soft tissue or perineum, and his lumber spine. I hypothesize that Wiggins could rotate substantially further if his saddle had an appropriate cutout.

Anterior rotation of the pelvis during hip extension is essential for proper muscle recruitment. As a simple experiment, try a standing back squat with an unweighted dowel, with your butt tucked under (sacrum vertical), as Stephen Roche is in the photo above. If you attempt a squat in a gym using this technique, not only would you most likely injure your back, as the lumbar spine would be supporting the weight, but you would also be unable to engage the gluteus maximus to drive the feet into the floor and lift the weight off the ground. The glutei maximi are the largest pair of muscles in the human body; we definitely want to take advantage of them when we pedal our bicycles.

Now try the same experiment, but this time use that “junk in your trunk” and stick your butt out, while flattening your lower (lumber spine). With your glutes engaged, it is possible to drive the heel into the floor, using both your glutes and quads to extend the hip as you thrust your torso upwards. When the pelvis is posteriorly rotated, function of the glutes is inhibited.

Many may think this discussion is absurd because Stephen Roche was a great professional rider, who won grand Tours, and therefore assume his choice of equipment was flawless and technique was perfect. Certainly, all the other riders who rode with rainbow shaped backs could not be doing it wrong as well; Kelly, Merckx, Hinault, etc. While Roche was certainly a great rider who won some of the worlds’ biggest races, who was one of the strongest riders of his generation, I argue that the technique he was using is by current standards outdated and archaic. Just as we now know it is not performance enhancing to eat steak the morning of a long road race, and that it is not advantageous to drink rum during snowy cold events, we know that in order to deliver optimal power to the pedals, the pelvis must be rotated forward. It is simply a matter of developing understanding of human function and improved positioning on the bike. Roche was not doing anything wrong; it is just that saddle technology has progressed to allow a superior method of sitting on a bicycle. There may be a better way yet again in another decade.

In my opinion, the invention of the cutout saddle was as big of an advancement in cycling technology as moving the shifters from the downtube to the brake levers. Riders who are still enduring a dome shaped saddle are using ancient technology. They are riding in the stone age and their crotch is paying the price.

IMG_2358

The SMP Dynamic, with a large center cutout.

Point number two: Curved side profile

Whenever I am on a group ride or just past the finish line of a race, and I hear the statement “we were going so fast in that tailwind section, I was way up on the tip of my saddle” or “I pushed way back in the seat to get more power on the climb” I cringe. Even though riders have done this for years, this is not optimal cycling. A well-trained, functional rider has a very narrow optimal range for saddle height, setback and angle. The closer the shape of the saddle matches the skeletal elements of the rider, the more important the exact position of the saddle becomes. The curved profile of the saddle is a key element to this. When the rider scoots forward or pushes back, they leave this optimal range and sacrifice mechanical leverage or efficiency, or both. Its not that this model cannot work to win races, it has for many years. Just as with the anteriorly rotated pelvis, we know now that this model is not optimal.

The bony ischium are similar to rocking chair feet; they are wide at the back, curved, and narrow as they come forward. If you put a rocking chair on a flat surface, like a hardwood floor, it has two small points of contact. This is equivalent to sitting on a flat saddle. The bones contact the saddle in only two small points, allowing the rider to scoot fore and aft at will, sacrificing leg extension in the process.

However, if you were to ‘curve the floor up’ to meet the shape of the rocking chair feet, the contact area would greatly increase, along the entire length of each “foot”. It would also prevent the chair from rocking, which is a bummer if you are a grandpa with a kid in your lap, but great if you are a cyclist. This stable platform enables great power production from a solid core. With a properly positioned SMP saddle, there is no more moving forward (into under extension) on the flats or pushing back (into over extension) on the climbs; there is only drops, hoods, and tops. This sounds uncomfortable to a rider who is used to moving around, until they try it themselves.

A flat saddle is a poor bike fitter’s dream, because it allows a lot of slop in the setup of fore-aft positioning, height, and sometimes saddle angle. Lacking a precise landmark upon which to center the rider, the flat saddle can be positioned “close enough” and the rider can figure out the details on the road. So many cyclists I know love the sport so much, and are looking for small improvements anywhere they can find them. Certainly having a saddle fore-aft position that is +/- 10mm is unacceptable to anyone who is serious about performance.

The true center of power production on the bike is the pelvis, and the more stable and anchored the pelvis is, the more power it can help you produce. During maximal seated cycling, the rider can engage the core muscles with less effort, keep the ‘frontal chain’ of the torso long and engaged, and drive the bike with perfect form and power, using both quads and glutes to extend the hips. When the saddle stabilizes your pelvis, it allows you to use your core to counteract the force of the hip extension, rather than keep your butt from bouncing up and down or working its way to the tip of the seat. A long, strong, neutral spine puts the athlete into a superior position for optimal function, and just as energy and strength increase under proper posture while standing, a collapsed frontal line will erode power and inhibit breathing on the bike as well. If this is not intuitively obvious to you, go forth and research it on the almighty google, this information is not hard to find (example here.) The goal is to have the cyclist bend forward at the hip, with minimal flexion of the lumbar or thoracic spine. The SMP design enables this goal far better than most if not all the models from other brands.

There are three main benefits to riding with a pelvis that is rotated towards the anterior:

  1. Superior activation and engagement of the glutes
  2. Exteneded, neutral lumbar spine increases the ability to “belly breathe”, which is difficult or impossible when the lumbar spine is flexed and the gut is collapsed
  3. Protects the discs of the lumbar and thoracic vertebrae by keeping the spine much closer to it’s natural curve. We get two sets of teeth in life, but only one set of discs. When they break down, it is usually not an insignificant problem.

IMG_2342

The SMP Full Carbon Lite, showing the massive curvature built into the base.

For off road riding (cyclocross and MTB), frequent fore-aft shifting on the saddle is necessary to move the center of gravity relative to the bottom bracket of the bike, in order to facilitate handling over rough terrain, steep climbs and steep ascents. This is still possible on a SMP saddle with a curved base, and when the rider comes forward to keep the front wheel weighted on a steep climb, leg extension is maintained, which makes it easier to apply power over the top of the steep incline.

Point number 3: padding

It surprises me how many riders and fitters don’t understand this basic concept: padding is a gasket to make to shapes that do not fit well together, fit together well enough to ‘get by’. Padding is a band-aid, it is something used to make due when things are not quite right. When a saddle maker wants to employ a simple, cheap, “one size fits all” approach, the easiest way to do this is to add a lot of padding. Padding between the ischium and the base of a saddle is imprecise, adds weight, and decreases pelvic stability.

SMP has several saddles in their lineup that are made from the same base, starting with bare carbon, and progressively adding more padding with each model. This allows the athlete to select the exact padding level needed based on the type of bicycle they are using, their own weight, and personal preference. Because a larger rider will place more kilograms per square centimeter (I only use relevant units of measurement) a heavier rider may need a bit more padding than a lighter rider, as a general rule.

For all you gram counters out there, its obvious that you want the smallest amount of padding you can get away with and still be comfortable on long rides. The weight penalty for adding padding to a saddle is substantial. Some people scoff at the idea of riding a saddle with minimal or no padding, but if the shape of the base matches that of your bones, padding on the saddle is completely unnecessary, especially when you consider that most chamois in modern shorts are 10mm thick or more. You are already carrying around padding on your butt when you wear cycling clothing, and the curvature of the base will distribute your weight over a large contact area, making generous padding unnecessary. The more padding a saddle has, the worse it fits you.

Consider that for off road applications, less padding can be used. This may seem counter intuitive at first, but when the rider is negotiating rough terrain, proper riding technique demands that the saddle is unweighted in order to let the bike ‘float’ under the athlete. This technique applies to cobblestones, cross racing, MTB racing on a hard tail, or dirt road riding. With proper technique, minimal road or trail vibration will reach the rider, and during smoother sections of course, the cyclist will have the benefit of an unpadded, rigid platform for power production.

rollers side

In the photo, you can see that most of the forward bend takes place at the hip, not in the lumber spine. The pelvis is tipped forward, with a sacral angle which is closer to 45 degrees than to 90 degrees (relative to the horizon).

My own personal choices for saddles are as follows, and are disclosed as an example:

Road: SMP Forma, carbon rails (no padding, leather cover only)

CX single speed: SMP Forma, steel rails (no padding, leather cover only)

CX geared bike: SMP Forma, steel rails (no padding, leather cover only)

MTB hard tail: SMP Forma, steel rails (no padding, leather cover only)

MTB full suspension: SMP Forma, steel rails (no padding, leather cover only)

Track: SMP Full Carbon Lite, carbon rails (bare carbon base, no padding, no leather)

Commuter: SMP Drakon, steel rails (medium padding)

TT bike: SMP Chrono, steel rails (no padding, leather cover only)

A Note About Aesthetics

There are certain old school riders who look at an SMP and cannot get their heads wrapped the aesthetic of the saddle. In comparison to a traditional saddle, the SMP has a large cutout and a swoopy, “beak” nose. To someone who is used to looking at Flites, Ariones and Concors, a SMP looks really bizarre.

Consider the origin of the aesthetics of most traditional saddles: they are made to look like Italian men’s dress shoes: long, slender, slightly phallic, covered in leather, pointy. Traditional saddles must be narrow, because a wide saddle means you have a wide ass, which means you are slow. In the old world, a saddle should be narrow, slender and sleek, barely noticeable, a silhouette under the rider. A seat is a leather perch upon which to conduct symphonies of pain and suffering.

In actual fact, a saddle should be as wide as it possibly can be, without making a rider bow legged or causing discomfort. The wider the platform, the more stable the base upon which to support weight and build power. I see riders come in frequently riding saddles that are one size too narrow, the product of a “butt-o-meter” reading which was imprecise and resulted in a tentative recommendation by a shop employee who did not want to be insulting by suggesting the rider size up to a 155mm wide seat.

A bicycle and all its components are tools to be used. The beauty of the tool follows the function; the more functional the tool, the more beautiful it is.

Cycling has a history of participants who make aesthetic choices, and as a sport it has an unusually high appeal to the artistic type. We don’t see many football players drooling over carbon fiber or worrying if their shorts match up with their tan lines. Riders sometimes make equipment choices based on how things look rather than how they perform. Case in point: the overweight rider weaving down the road with a slammed stem and jacked saddle, who can barely reach his own handlebars. The bike looks great parked at the coffee shop, but when its owner climbs aboard, it’s a disaster.

This information is intended to further expand on Steve Hogg’s excellent article All About SMP’s. If you are unfamiliar with the SMP saddle line up and would like to know more about individual models, please click the link and consult Steve’s article.

Tips on setting up SMP saddles:

Initial adaptation: Supporting the weight of the trunk on the ischium does require a small adaptation, as the nerves in the skin under the bony surface must grow accustomed to the increased pressure felt on those areas. For most riders, this takes 3-12 days, depending on the weight of the rider, the mileage ridden, and how accurately the saddle is positioned. Once this adaptation happens, the saddle ‘disappears’ under the rider. Sometimes, this nerve pressure reaches a ‘crescendo’ of discomfort before adaptation occurs.

A rider may or may not notice a decreased pressure sensation on the soft tissue (perineum). In combination with the increased pressure under the ischium, it can be confusing to figure out if the saddle feels “high” or “low”. The rider may feel differing sensations, sometimes in the same training session. I encourage athletes to be patient and only make changes to saddle position after consistent sensations are registered over the span of a few training rides.

Keep in mind that any calculations you make about saddle height and fore-aft position relative to your old saddle may be meaningless if you switch to a SMP, since your entire pelvic angle changes. This is a good thing, as usually you begin to use your glutes more effectively. It may also mean you need a longer stem, if you begin to ride with a more extended, stronger, more neutral and more aerodynamic spine.

In general, my recommendation is to run the saddle as nose down as possible, provided that the rider is stable and not sliding forward under pressure (under power). The acid test for this is a long gradual downhill, ridden in the drops, in Z2 or Z3 pace. If the athlete is not sliding forward under these conditions, the nose is high enough. Keep in mind that extremely small increments of adjustment can make a big difference in these cases – 2 or 3mm at the nose height is one ‘standard adjustment’ and may be all that is needed. I recommend saddle angle adjustments be made in very small increments, as only a few millimeters can be the difference between discomfort and perfection.

Another aspect of the SMP saddle is that there is only one place to sit in it, in regards to fore-aft positioning. This is right in the center of the trough. If you push too far back, you will feel a ‘wall’. If you try to move forward, you will feel a ‘ramp’. If you are sitting on the ramp consistently, it may mean the saddle needs to come forward. Its common for riders to slide forward on a flat/dome saddle, replace it with a SMP, and then feel as though they are riding on the ramp of the saddle after the switch, especially when riding at higher intensities. Many times this is because the rider is used to sliding forward under pressure. It can take time for a rider to become accustomed to producing full power under proper leg extension, so be patient. It is also possible that the saddle is too far back. Riders will sit about 10-15mm further back on a SMP saddle than on many other saddles, as a general rule, but this is highly dependent on the individual athlete of course.

When in doubt, or if you can’t figure it out, see a good bike fitter who works with SMP saddles and can help guide you through the process.

Random Rant: As a side note, I must digress. Cycling is a beautiful sport but it is dominated by folklore and bullshit chit-chat all too often. I frequently hear discussions in cycling stating that if a professional rider does it, it must by law be the ideal, or the best. There are four simple facts that are ignored commonly when discussing “what the pros do”:

  1. Pros are Paid to Ride What They Ride: With a few small exceptions, professionals are paid to ride particular equipment, it is not a choice they made in most instances. Teams select the components, shoes, eyewear, saddles, handlebars, drink mixes, and most everything else a ProTour athlete uses on a daily basis. Equipment ridden by professionals should be regarded as that produced by the companies with the biggest marketing budget, which has nothing to do with what the best equipment is. The best equipment and the companies with the money to sponsor ProTour teams are not necessarily related an there may or may not be overlap in the subsets of those equipment pools (frequently there are not).
  2. Changing at the Pace of Snow: Cycling is one of the slowest sports to adopt change of all sports worldwide. Anyone who follows the politics of our sport can see this clearly, even at the most elite level it is managerially speaking, stuck in the stone ages. Simply because something has been done a certain way forever, does not make it ideal and cyclists as a group tend to be very resistant to change. Of course, there are exceptions but the point is that just because something has been done a particular way for a long time does not inherently make it the best method or choice; it simply means its has not been a disaster for a group of users who have prominence in the domain of cycling.
  3. Cycling is Enigmatic: There are 1000 factors that make a rider successful (or not) in any given race, and many times riders decide that one critical factor made difference in their victory (e.g. “lucky socks”). The rider’s attempt to explain a performance can make them irrationally dogmatic about their equipment and their passion for a certain professional rider’s panache or style may make them irrationally loyal to a certain brand or aesthetic. This behavior can be counterproductive when a rider is asked to honestly assess his or her own equipment choices, training methods or behaviors.
  4. In Spite of, Not Because Of: Many professionals are what Steve Hogg would refer to as “super compensators”. This means they naturally fall on the end of the spectrum of human existence where their performance is not impacted by events or things that would be severely disabling or crippling to most humans. This is one of the reasons they are pros. These riders can get away with a lot more than most people can in terms of abusing their bodies with hard racing, improper posture, and asymmetries while still producing high levels of power on the bike. This is not true of every pro; some wrestle with back or knee problems their entire career, but many live in a seemingly injury-free bubble. This does not mean their positions and bodies are in perfect heath, or that their equipment is set up optimally; many times there are professionals winning races who are a complete train wreck on the bike. It just means they are really good athletes and for whatever reason, they can tolerate this load without perceiving problems.

Disclaimer: I am the owner and sole employee of Pearce Coaching and Fitting, and I am a Steve Hogg Certified bike fitter. I also sell SMP saddles out of my Boulder fit shop.

SMP did not solicit or compensate me for this article, and the opinions expressed above are mine and mine alone. I had the opportunity to become a SMP saddle dealer after I began riding their products, and took the opportunity immediately because I believe in the product.

PTI Orthotics

In 30 years of cycling, I spent 24 of them struggling to have a good connection to the pedal. This was in part because of my feet, and in part because cycling footbeds did not exist (or were poorly made) when I started riding.

1989: As a junior rider, I was the kid who had his shoes so tight, the straps were hanging down off the ends of the shoe soles, dangling like spagetti straps in the wind. I don’t have particularly narrow feet, but for the length of foot I have, my feet are extremely low volume (just like the rest of me: skinny). This means that in most conventional cycling shoes, my foot flops around like I am wearing a shoe box. Power transfer is terrible, arch support is non-existent, and proprioceptive input is concentrated to a few square mm of total area.

In 1995 I got my first pair of custom made cycling shoes from Don Lamson (owner of D2 now, back then it was just called Lamson). He made me some custom footbeds using a crush box style impression system, and they were light years ahead of the stock “footbed” (read: 2mm eva foam liner of uniform thickness) that came standard (and still comes standard, because nothing in Italy ever changes) in Sidi shoes of that era. While the arch contour in the Lamson footbeds was not perfect, it was a massive improvement for me and I instantly saw an increase in sprint power (yes, I had a SRM in 1995…#bikedork)

This helped me tremendously but also complicated things, as it further enabled my tendencies towards tinkering and optimization. Over the next 15 years I would ride in a dozen different types of custom orthotics including multiple pair from Lamson/D2, multiple castings from Russell Bollig at Podium, a few pairs of E-Soles, R7 with integrated footbeds, and LUST carbon shoes with integrated footbeds. Of all these shoes, the LUST (Light Up Speed Technologies) were the most radical design; they were basically a carbon sock with a cleat attached, and seat belt straps worked as an “upper”.

All of the above methods used a lazer scan on a “foot pillow”, a “STS plaster sock” or a foam crushbox method to cast the foot and arch. None of these worked for me, for one primary reason: my foot is way, way too flexible, if it is ever cast with any weight at all, the curve of my arch changed and my foot was no longer held in optimal alignment. The goal of any quality footbed is proper support and the elusive “sub-talar neutral”, which is like petting a unicorn. When this happens, power transfer is automatic and repeatable.

On a scale of brick to gumby, I am gumby + 1. I don’t think of this quality in binary terms; it is not “good” or “bad”, life isn’t a Disney movie. It is filled with sliding scales, and in this case I am on the extreme edge of one side of the scale. Any time you are on the extreme edge, there is a price to pay.

For me, orthotics have become such a significant piece of equipment that I never travelled to a race without my shoes in my carry on (a cardinal rule for any true professional). If I were to show up to race with shoes, but did not have my footbeds, I would not even bother to start the race. I would be so uncompetitive, there would be no point.

The advantage for being extremely flexible is that it allows me to have multiple bikes that have featured on slamthatstem.com. The down side is that when your soft tissue is hyper mobile, it can become a challenge to make force effectively, or control large amounts of force. It also tends to make you an orthotics princess. For all of you who envy my low bars, keep in mind that it doesn’t come for nothing.

In 2013, Aaron Anderson of PTI Orthotics made me a pair of custom footbeds, and they are the first pair anyone has made for me that has required zero tinkering. I got them on a wednesday and raced them on the weekend, felt great and had my best result ever on a course that normally does not suit my type of riding. It was an extremely good experience and I have been using his footbeds ever since.

What is different about Aaron’s methods that made the difference? Aaron uses a completely unweighted scan of the foot to make the shape of the orthotic. The client lays prone and the foot is scanned while it is held in a neutral position. Aaron uses various assessment methods to decide what modifications, if any, are made to the model, which is saves as a file. Once the final shape is determined, a CNC machine makes a positive mold of the foot, from which one or more identical orthosis can be manufactured. Aaron uses your cycling shoes during the process to ensure they fit into the shoe perfectly.

In my case, this meant adding a substantial forefoot posting (3 degrees on both sides) to offset forefoot collapse under load. Aaron and I discussed my feet at length and he shared his opinions on the current barefoot running movement…while some athletes may be able to condition their feet to handle the stress of running with minimal or no support, Aaron feels I am definitely beyond that range of functional improvement, regardless of my methods or drive. My ligaments are so mobile, no amount of foot conditioning would help.

Another way to think about it: as world famous triathlon coach Bobby Mcgee said at a recent coaching seminar I attended “Show me a really flexible athlete, and I will show you a terrible runner.”


Aaron can make footbeds for all types of feet, not just dysfunctional cyclists such as myself. The material he uses for the footbeds matches the need of the athlete. If you are interested in visiting Aaron for a consultation, note that he has two offices (one in Boulder, one in Longmont). You can find out more information about how to book an appointment here.

You leave the appointment with a CNC cast of your foot, so that you can have multiple pairs of identical footbeds made if required.

In 2018 Aaron made me a pair of prototype carbon footbeds, which work great for me. I have consistently found that the stiffest platform possible always serves me best in the long run.


Appleman Custom Road Bike

Appleman Custom Road Bike

I recently completed a new road bike with the help of custom builder Matt Appleman of Appleman Bicycles, out of Minneapolis.


Having raced for 3 decades, I have had the opportunity to ride a lot of different bikes. Some of the whips I have had the honor of pedaling:

1988 – Vitus 969 bonded aluminum

1989 – Cannondale 3.0 aluminum

1990 – Zinn steel road, LeMond steel track. Specialized Stumpjumper hardtail (rigid fork)

1991/1992 – Bridgestone RB-1, Zinn steel TT bike

1993 – Zinn steel road #2, TIG welded

1994 – Nobilette steel track

1995 – LeMond titanium (made by Clark Kent in Denver), Lotus 110 TT bike

1996 – Litespeed Vortex 6/4 titanium road

1997 – Moots titanium soft tail MTB

1998 – Litespeed Vortex 6/4 titanium road

1999 – Marin aluminum (Shaklee)

2000 – Marin aluminum (Shaklee)

2001 – LaBici aluminum (Prime Alliance)

2002 – Klein aluminum (Ofoto)

2003 – LeMond Aluminum (5280 Magazine)

2004 – Javelin aluminum road bike (TIAA-CREF)

2006 – Felt F1 carbon road bike, Specialized 26″ hardtail with a 650b front wheel (like a 69’er but really a 6-27.5’er?)

2007 – Felt DA TT bike, TK-1 track bike, road bike, Javelin track bike

2008 – Cannondale 26″ Scalpel (ridden with a 650b front wheel for most of it’s life)

2010 – Cannondale Scalpel 29er, Cannondale Super Six Evo

2009 – Felt FR-1

2011 – Bianchi Oltre carbon (Horizon Organic p/b Panache Cyclewear)

2013 – Trek ProCaliber (test program) , Salsa Beargrease 1 Fatbike

2017 – Fifty Point One aluminum track frame (look for website soon!)

This is only a partial list, because it is hard to remember all that stuff. Having ridden this many bikes gives me great context to understand how subtle differences in geometry, tubing material, wheels and tires, and rider position impact handling and ride experience.

As road bikes have evolved, they have changed with the demands of the market and this has meant frames are now much taller than they used to be (in comparison to the same length, historically). In 2004 a 54cm Felt road frame fit me quite well off the shelf, with a 120 or 130 x 84 or possibly 73 degree stem. As a rider who is 175cm (or 5’9” in obsolete units)/ 63kg, and who has average length limbs for his torso size, it would not appear that I need a special frame but there are factors that change this equation; I am extremely flexible, I bend very effectively at the hip, and I sit with an extremely extended spine. This means I ride a frame with a very long reach, and a large saddle to bar drop, in comparison to similarly sized riders.

In other words, I tend to get a lot of complaints from people who sit on my wheel, because I don’t give off a lot of draft. As I like to say, some riders are blessed with actual horsepower, some (like me) are blessed with an aero shaped ass. You take it where you can get it.

Given that I am a bike fitter, it makes sense that the frame I ride fits me perfectly, and in 2018 there are few if any production bikes that will do this. The last 4 years I have ridden a 56 cm Felt FR-1. For years, Felt built some of the ‘lowest and longest’ production frames on the market, and because their stack was acceptably low I chose a larger size to get more top tube. The bike is set up with a -20 degree stem, which looks at odds with the sloping top tube, but gets the job done. In 2017 Felt jumped on the short/ high geometry train, and this led me to explore various custom bikes. After researching a lot of different options, one that appealed to me most was Appleman, a custom frame builder out of Minneapolis who specializes in carbon.


I began to dialogue with Matt Appleman about 2 years ago, and the project finally came together in the winter of 2017-18. Appleman frames are custom built for each rider, and have a minimalist, industrial look. The frames are finished in UV resistant raw carbon, which allows the rider to see the workmanship that goes into the frame. Matt has tubes made in the US to his specifications and runs all cables internally, which gives the frame a clean aesthetic. The Appleman name and logo are made from carbon, wood or metal. He has complete control over the design and manufacturing process from start to finish, which makes the product an authentic representation of his labor and passion.

Matt and I went back and forth on various details of the frame, based on the geometry I supplied and the intended use. Most of my rides include hard pack dirt or gravel, and I wanted the bike to be capable of handling fast group rides (and maybe some races) with plenty of tire clearance for rougher riding if desired. However, I didn’t want this bike to blur the lines and become a gravel bike. I wanted the bike to be capable of riding on gravel, but also race ready. My philosophy aligns with the saying “pick the right tool for the job” and for my jeep road/ adventure / high alpine explorer-scout missions that will involve significant off-piste time, I will use my custom Seven Evergreen (being built as I write this, stay tuned for a similar review when it is done). For road riding, I will use the Appleman.

Disc brakes were an easy choice for me. Even after all the controversy I am still surprised to find people resistant to adopting them. The technology is inarguably superior and a rim brake simply has too many jobs on the To Do list in to pull it off without compromise. Separating braking load from suspension, cornering, holding a tire on and dealing with road surfaces has freed engineers to make a rim that is much more capable and true to it’s purpose. I can’t help to think that anyone who is still holding on to rim brakes simply has not tried good disc brakes, because once you realize how good the performance is, there is no going back.

The Mavic Cosmic Carbone Pro wheels are silky smooth and fast. The rim depth is enough to be an aero wheel but not so much that they become unpredictable in the gusty winds of the Colorado Front Range. Tubeless set up on these wheels was beyond easy. With an internal rim width of 17mm, 25mm tires mount up easy but I can go up to 30mm and still have a good relationship between rim stance and casing width. Being a rider who regularly negotiates long descents in the summer, I decided to skip the entire carbon clincher movement until disc specific rims were engineered and came to the market.

I selected Syntace 42cm aluminum handlebars. The features I like in this bar are the 6 degree back sweep, which allows for a slight external rotation to the hands and shoulders, even when the thumbs are wrapped around the bars. The low angle of the anatomic drop works for me as well, I would be ok with an ‘infinite curve’ style but these are working for now. I am still on a quest to find the perfect road bars, and while these are the leading candidates at the moment, there is still work to be done in my opinion.

The saddle is a SMP Forma with carbon rails. Those of you who know or ride with me understand that my butt doesn’t touch anything else. It is the best product on the market by a significant margin not only for me, but for 90-95% of my clients. At some point down the road I may spring for a custom cover from Busyman cycles to bling it up a bit. If you want to read more about why I love SMP saddles so much, check this.

In the end, we agreed on a stack of 510 and a reach of 390, which I have set up with a 73 degree x 130 mm road stem, with 5mm of spacers underneath. If you compare this to most modern geometry charts, this is comparable to a 52 or 54 in stack, and a 56 or 58 in reach. In order for me to fit a Cervelo S5 in the current iteration, I would ride a 51 cm frame with a 140 or 150 x 73 degree stem. While bikes set up like this can certainly function, and a good bike handler can make almost anything work, it doesn’t mean things should not be optimized.

Matt specifies a PF30 BB on his frames, noting that as he has precise control over manufacturing, the design works as it should (read: no creaking due to QC frame manufacturing issues). Following James Huang’s perfect review of the Enduro XD-15BB, this is the BB I chose.

House of Spin built the bike for me, from start to finish. They are the best service shop in Boulder, if you need your new whip dialed in and want perfection, look no further.

I have worked with Ceramic Speed over the years on a few projects and they were kind enough to send me an Oversized Pulley Wheel System for my 9100 rear derailuer. They even laser etched my name in the pulleys, which is ridiculously cool, it feels super World Tour and the drivetrain is lightning with this addition.

Some people can’t understand why I chose mechanical shifting over electronic. Just because someone makes something with a battery, does not mean I have to run out and buy it. I have too many batteries in my life already, the last thing I need is more EMF’s and to not be able to shift when the battery dies on a ride. A cable fails only once every 10 years or so. Over and over, I hear about how long the charge lasts in the battery for Di2, and over and over I hear stories about how people’s batteries run out of charge on rides….It’s like the statistic about how many women have orgasms during sex. If you do the math, someone is faking something.

The other problem is my current number of bikes, which is drifting towards N+1. Although the track bikes don’t count, If I put electronic on one, I would eventually have to install it on the others.


After testing power meters from virtually every manufacturer on the planet, the unit I chose for this bike is the SRM Origin 30. With Dura-Ace 9100 rings, it has perfect shifting and the carbon arms (made by Look) are ridiculously light and stiff. Some people complain about the price but the stuff just works, day in and day out. After Greg LeMond, Jonathan Vaughters and I were the first Americans on SRM (back in 1995) so I am very familiar with their products.

Matt chose internal cable routing for a clean look, which I definitely appreciate. The fully guided cable routing means no weird bent coat hanger tools are required.

APPLEMAN CUSTOM ROAD FEATURES:


  • internal cables
  • fully custom geometry (collaboration between Colby and Matt)
  • flat mount disc brakes
  • clearance for 32mm tires
  • 44mm headtube
  • industrial, natural carbon aesthetic
  • thru axles
  • flat mount brakes

COMPONENTS and BUILD SPECS:

  • stack: 510mm
  • reach: 390mm
  • stem: 130 x 73/ -17 degree Zipp SC SL
  • bars: Syntace 420mm
  • drivetrain + brakes: Dura Ace 9100 mechanical/ hydro, 11-28
  • pulleys: Oversize Pulley Wheel System by Ceramic Speed, with my name on them
  • cranks: SRM Origin 30 Power Meter with Dura Ace 9100 Chainrings, 52 x 36
  • seatpost: Thomson Masterpiece 16mm setback x 27.2
  • saddle: SMP Forma with Carbon Rails
  • wheels: Mavic Cosmic Pro Carbone SL SSC tubeless
  • tires: Mavic Yksion Pro Tubeless 25mm
  • pedals: Speedplay titanium, 47mm axles


THE RIDE:


After riding production bikes for 30 years, it is great to have a bike made specifically for me. Everything about this bike feels like home. The bars are in the perfect place, and the bike is “point and shoot” when it comes to corners. It does exactly what I want it too. The frame is plenty stiff for me, but floats over dirt and crap pavement. Every tube was selected by Matt to help the bike ride the way it should for me, based on the specifications I supplied. Tire clearance is fantastic, designed for that day when I hit 50 meters of the infamous Colorado clay and the bike normally just stops.


I designed the front center to be just a few millimeters shorter than my Felt, while allowing the bars to be about 10mm lower. This prevents me from having to make a small slide forward on the saddle to weight the front wheel enough, which sometimes happens on the Felt. The 71mm bottom bracket drop and 415mm chainstays are made for long descents and high speed stability. I don’t need to out criterium anyone on this bike, I want it to carve big fast arcs bombing (safely) down SuperFlagstaff, and be able to dodge the deer and tourist vehicles long before they interrupt my velocity. The 72.75 degree head angle and combination of 43mm offset Enve fork make the trail 59mm, right in the sweet spot.


Click here to find out more about Appleman Bicycles.


Thank you to House of Spin for building the bike!


Thank you Ceramic Speed for the sweet drivetrain candy!


Thank you Matt Appleman for working with me on this amazing project!


Thank you Mavic for the sick tubeless hoops!


Thank you Speedplay for years of support!


Fitting a Track Bike

Fitting a Track Bike

Colby Pearce


A bicycle should be fit based on two primary considerations: the physiology of the rider, and the demands of the event.

The physiology of the rider may include the smoothness of the pedal stroke, the joint angles at which effective force can be delivered, and ability to bend at the hip without compromising the lumbar spine.

In the case of track cycling, the demands of the event include: a broad range of cadence demands (from standing starts and low speed accelerations in a big gear, to sustained high cadences during a team pursuit and high speed sprints in a points race or keirin), an aerodynamic rider position, high power output (both sustained and in short durations, frequently with short recovery), precise weight distribution over the axles for high speed maneuvering. Track races have higher average speeds than most road events, so in some cases it may make sense to place the rider in a more aerodynamic position on the track bike.

The starting point of this article will be assuming that fit on the road bike is dialed in. From my perspective, this means:

  • Proper saddle setback, which puts as much weight as possible on the saddle given the mass distribution of the rider, the limb and torso length, limitations lower back and hamstring mobility, flexibility and ability to generate symmetrical force while in a position of acute hip flexion.
  • Proper bar height and extension which is set according to the mass distribution of the rider, the limb and torso length, limitations lower back and hamstring mobility, flexibility and ability to generate symmetrical force while in a position of acute hip flexion, and is set within context of the demands of the event the bike is being fit for (for example, longer road rides with lots of vertical gain vs. shorter, faster group rides).
  • Proper saddle height set within the parameters of pelvic stability and pedaling technique.
  • Proper arch support, foot correction and cleat position.

Relative to an aggressive road position, the track bike may have the following considerations:

  • Bar height: may be lower (1-3cm) reach than road bars. This depends on the context of the road position. If the rider is already very aggressive on the road bike, no change may be necessary. If a rider is at their functional limit on their road bike, no change may be possible. When a rider shows a high level of function, a good baseline is to place bar height so the torso is horizontal with a slight bend in the elbows when in the drops. This allows for a slight relief of the torso angle (perhaps 5 or 10 degrees) with the arms straight.
  • Stem length: may be shorter, the same or longer depending on the style of the rider. Some athletes tend to “curl” the spine under maximal loads at very high cadences. While this is not ideal form, it may be very difficult to change this habit under maximal load and as a result, the bars may “get too far away” during sprints. This may be particularly true for a rider who uses an old school “flat/dome” style saddle (such as a Flite, Rolls, or Arione) and who comes forward towards the tip of the saddle under high load. For riders who are more anchored in the saddle, ride with a more extended spine and have a more complete pedal stroke, a longer reach may work better. This is because as the athlete sprints through turns, they will have the sensation that the bars are coming towards them, as a result of the centrifugal force of the turn compressing the athlete. In some cases, trial and error on the velodrome may need to be the final determining factor in stem length. This cannot be simulated on any trainer or fit bike.
  • Handlebar width: may be the same as road, or 1 size (~2cm) narrower. Many riders find that the increased clearance provided by narrower bars gives a window of safety they appreciate when in a peloton. A narrower bar is more aerodynamic, but gives the rider a reduced point of leverage to pull from during standing accelerations and standing starts. Most riders find the narrower width to be acceptable on the track, even though there are moments when it is necessary to apply a lot of force to the bars at low speed, in a very big gear. One product in particular, the 3T Scatto track bars, come in very narrow 350mm and 370mm widths. Many riders find these bars work well for sprinting and some even use them for points racing and other mass start events. They are not advised for madison racing, as the tops flare forward from the stem, which does not allow for a stable platform from which to throw in a rider during exchanges.
  • Pedal stance: many track riders use road pedals or modified road pedals on the track (clipless pedals with an added toe strap) so in most cases, pedal stance ends up being 9-12mm narrower than on the road, due to the fact that most track cranks have a narrower pedal separation distance than most road cranks. The typical PSD (or Q factor) for track cranks is 136-140mm. Most road cranks are in the range of 148-152mm. Many riders tolerate a narrower stance quite well, but this may be more of an accident than by design; if the rider is prone towards symptoms of “medial collapse” (IE one or both knees hitting the top tube, or one or both feet showing signs of pronation) then moving the feet closer together will help alleviate these poor movement mechanics without educating the rider of the root cause. For riders who would do better on a wider stance, riding a track bike may be problematic and could require some creative equipment selection. The simplest choice may be a pedal system with longer axles (both Shimano and Speedplay currently offer these options).
  • Saddle setback: setback can be the same as road or slightly more forward, depending on if bar height changes. As the bars come lower, the hip angle will become more acute (all other factors being equal) so if the goal is to maintain hip angle between bikes, the saddle could come forward to accomplish this. Another way to achieve the same goal could be to use shorter cranks on the track bike. Moving the saddle forward comes at the potential compromise of posterior chain muscle recruitment and support of the torso by the saddle. As the saddle moves over the bottom bracket, there is usually more reliance on quads to drive the pedals and more postural muscles will be recruited to support the weight of the thorax.
  • Crankarms: cranks can be the same or shorter (2.5-7.5mm) on the track bike. Often, riders coming from the road have the instinct that their crank length should be constant between all bikes in order to minimize the impact of change. At times, when a rider uses a crank that is too long for mass start racing or sprinting, it will limit their top end cadence. This can be a race deciding metric. Crank length choice is multi-factorial and should be evaluated with the help of a competent professional fitter. If you don’t know what length cranks you should be on, start by reading this article: http://www.stevehoggbikefitting.com/blog/2011/06/crank-length-which-one/
  • Cleat position: may be the same as road, or further forward. As the cleat and axle move forward (towards the toes) the lever arm created by the foot becomes longer, but more ankle stabilization is required by the gastroc group to make effective use of that leverage. A forward cleat position favors events that are shorter in duration; require very high cadences, and explosive change in pace. For riders specializing in endurance track disciplines (points race, pursuit, madison, omnium) Steve’s method 1 is recommended. For riders focusing exclusively on sprint disciplines, riders may be forward of method 1. For information, see Steve’s article: http://www.stevehoggbikefitting.com/blog/2011/04/power-to-the-pedal-cleat-position/
  • Saddle height: normally this would be the same as the road bike, but adjusted for different length cranks. This means if your track cranks are 2.5mm shorter than your road cranks, your saddle will be 2.5mm higher on the track bike in order to maintain leg extension at the bottom of the stroke. This is most easily accomplished with the exact same saddle on both bikes. If different saddles are used on the bikes, accounting for the compression of padding and base materials, and different base shapes can get quite complicated and amounts to a pile of guesswork as there is no easy or reliable way to quantify these factors. For a rider who wants to precisely control variables, identical saddles are the first choice.

Another factor to consider in track bike set up is weight distribution relative to the axles and the bottom bracket. Track bikes are different in that when the rider is cornering or changing direction, they are always pedaling (hopefully!). This means that standard handling rules do not apply. A rider does not coast, put the outside foot down, push hard on this foot and simultaneously lean hard on the inside bar to make the bike lean as they would on a road or cyclocross bike. This means the rear wheel potentially has less weight to “anchor it” during quick changes in direction. Skipping a tire during an abrupt change in direction on the track can be disastrous, so we work to avoid these scenarios. In particular, during madison exchanges if the rear wheel is not weighted properly, the bike can become unstable which leads to powerless exchanges or in the worst case, a tumble.

It is somewhat common for a rider to ride with their saddle more forward than optimal on the track. Because the fixed gear “assists” the rider through the dead spot (from 10 o’clock to 12 o’clock), many times an athlete can have pretty poor technique and not really be aware of it. If the saddle is too far forward on a road bike, when a steep climb begins the rider will feel loaded quads and a magnified dead spot. The decreased inertia and slower cadence will magnify the poor technique and it will be easy to diagnose the problem. This is camouflaged, to a degree, by a fixed gear bike and the fact that there are no climbs on a velodrome.

Dortmund 6 Days


SMP Setup Tips

Guide to setting up SMP saddles

Italian manufacturer SMP manufactures saddles with base shapes that more closely match the shape of the human ishium than most other saddle designs. This feature makes the saddle an excellent platform for a rider to generate power. Setting up a saddle that reflects the shape of skeleton more accurately requires more precision than a saddle with a less specific shape. When saddle setback, angle and height are all precisely adjusted, and the correct model is selected for the rider, the saddle will completely disappear under the rider. This is the end goal of any saddle fitting.

Some points you may find helpful:

  • The nose angle should be set as low as possible, provided the rider is stable. When a rider is stable on the saddle, its possible to ride in the drops for long periods of time (20 or 30 minutes) on a false flat downhill under moderate power (high Z2 or Z3 pace) without doing “The Typewriter”. When a rider is not stable in the saddle, under moderate or full power, they will scoot towards the nose in small increments, and into under-extension, until they are forced to correct their position with a giant movement backwards. This cycle is repeated and power is lost during all the moving around. The lower the nose angle, the easier it is to rotate the pelvis forward and engage glut.
  • The saddle nose is too high if the athlete feels pressure in the front of the crotch, provided they are seated in the “trough” of the saddle. In a saddle with significant curvature, there is only one correct place to sit, at the bottom of the “trough”. Scooting further back, there is a “wall” and scooting further forward puts the rider on the “ramp”. If the rider feels pressure in front, first make sure the rider scoots back to be seated in the “trough”. If the rider consistently scoots forward onto the ramp, the saddle may be too far back behind the bottom bracket and may need to come forward 5mm on the rails. If the rider is seated in the “trough” and still feels pressure (especially in the drops), the nose angle should come down in 0.2 degree increments. A small adjustment can make a big difference.
  • The nose angle should between 0 and 5 degrees nose down in most cases, and roughly proportional to the saddle-to-stem drop as a starting point. The better a rider is at rolling the hips forward and sitting on the bike with an extended spine, and the lower the stem is relative to the bars, the more towards 5 degrees the saddle nose should be.
  • The true finalization of saddle angle must be done riding outdoors, as no indoor trainer or rollers accurately simulates road load. Subtle changes in a rider’s pedaling style will influence bike posture on the trainer, which can lead to a perception of stability on the trainer which does not exist in outdoor riding. Get it close and then let the final test be over a week or more of riding in real world conditions.
  • In the absence of a digital level, an “Angle Finder” application can be downloaded for your smartphone in order to set up saddle angle with precision. Place a level object (such as a rigid book or wide ruler) across the top of the saddle and measure angle with the phone on this surface. Some things to remember: make sure your bike is on a level surface, or the saddle angle will be meaningless. Use a four-foot dowel or other long straight object and lay it next to the wheels, and use the angle finder to confirm the level of the floor. Also, if your smartphone has buttons or other gizmos on the side which will change the angle relative to the surface to be measured, they must be accounted for, or the other side of the phone can be used for measurement. The measurement is taken from the highest points (the tail and the high point of the nose).
  • Many riders sit further back on a SMP saddle in comparison to traditional saddles. In many cases, in order to keep the same position relative to the bottom bracket, this means placing the SMP 5-10mm further forward than the previous saddle. It depends on the rider and the saddle, and may not apply if a rider was previously riding a saddle that was too narrow.

There is some adaptation to a cutout saddle. The nerves under the ishial tuberosities must adapt to carrying the weight of the torso, especially if the rider has not ridden a cutout saddle in the past. This adaptation will vary in length depending on how heavy the rider is, how padded the saddle they chose is, and how much riding they do. A general timeline is one to three weeks. The discomfort can reach a crescendo before adaptation occurs and relief is achieved.


IMG_2472